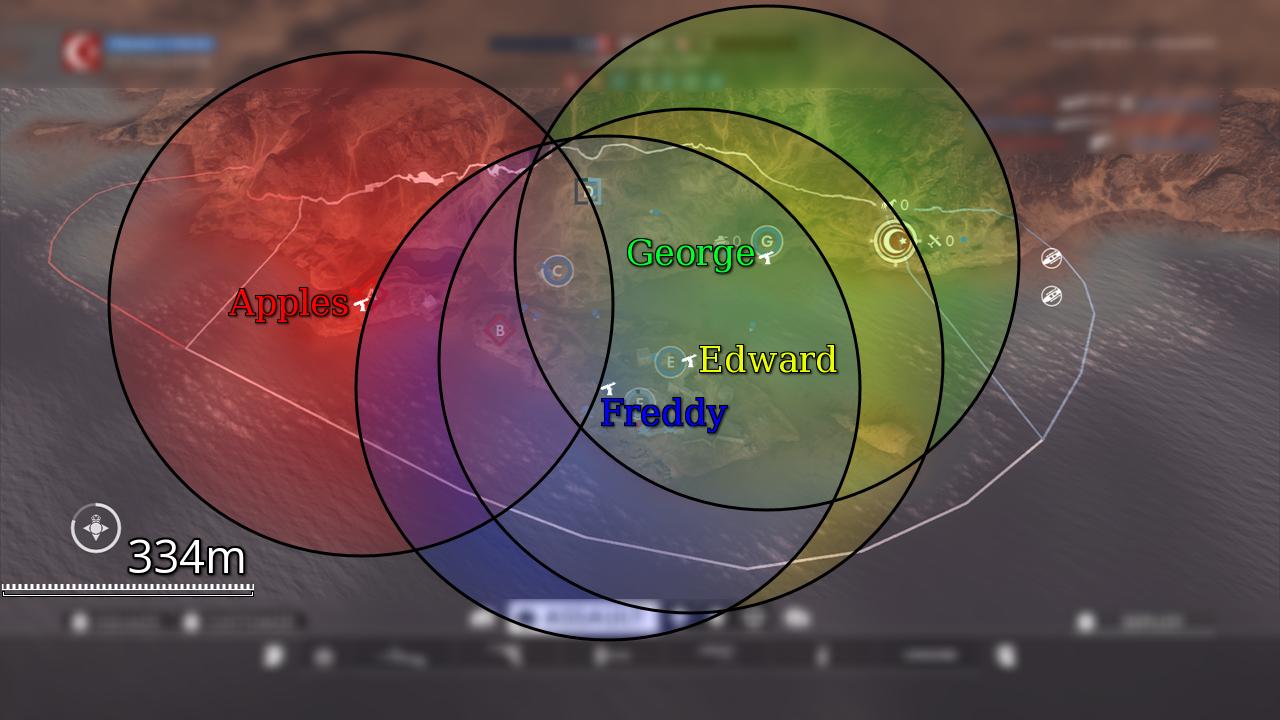
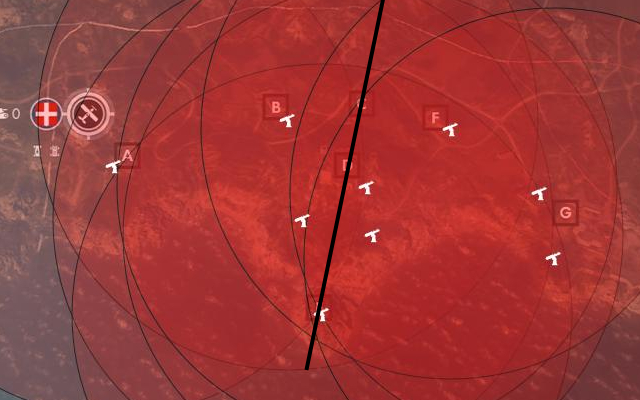
Yo. I couldn’t find such a thread myself, and I bet there is one and I’m just an idiot, but hey, if it doesn’t exist then it does now. This is nothing more than a rookie guide as to where all the AAs are located on the 7 Maps they are present; St. Quentin Scar, Monte Grappa, Fao Fortress, Ballroom Blitz, Empire’s Edge, Sinai Desert and Giant’s Shadow. Just a few things I want to get out of the way first;
-this is NOT perfect. I probably missed a few here and there. This also only counts Xbox AA (understandable as that’s what I play), so if there are any AA Specific to PS4 (doubt it) or PC, they’re not here.
-Stationary AA Has a range of 334m according to the patchnotes I read (for Giant’s Shadow or somethin’? I dunno). Whether that’s still true or not, I’m not sure. Additionally, Behemoth AA Has a range of 400m according to the same patchnotes, while Artillery Truck AA Isn’t listed but I would guess it’s the same as Stationary AA At 334m. I have tried to roughly estimate these ranges for each map, and well, you’ll see how messy that gets.
-Stationary AA, as a guess, has a respawn time of 3 Minutes. I only tested this once on Fao Fortress, so I’m not sure if this is actually true or not or if it varies across maps. So yeah, take that with a hint of salt.
-I likely do not plan on doing this again for the They Shall Not Pass DLC. I just don’t feel like it, especially given this thread will probably die within a day.
-this is strictly Conquest. No, I’m not doing the same for Operations, Rush or whatever. They may use the same spawns, they may not, frankly ¯_(ツ)_/¯.
-for some reason there’s link where there shouldn’t be below (the hashtags). Don’t bother clicking those, I think they just send you to the search function or something.
That aside, let’s get to this. Note, this will be a LOT of images, and as I don’t like the spoiler system on this site, well, it’s gonna get messy. I’ll probably go through it again at some point to try to make it more friendly to read (especially with the AA Ranges), but atm, I’m happy as it is.
St. Quentin Scar:
St. Quentin Scar has 8 Stationary AA Guns from what I can tell. 2 Are located in each deployment while 4 Others are spread across the map. Here is the rough map of their locations;
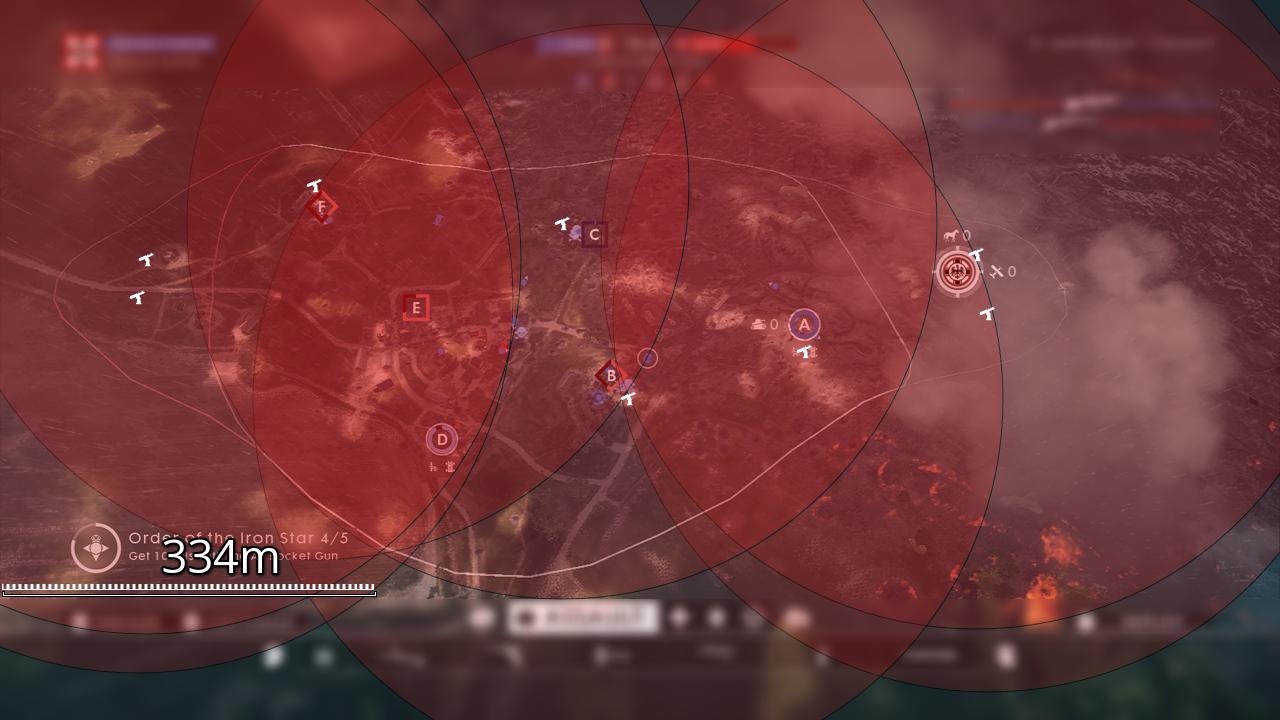
And here are each of their specific locations:
British Deployment #1; this sits directly behind the windmill located in the Deployment.
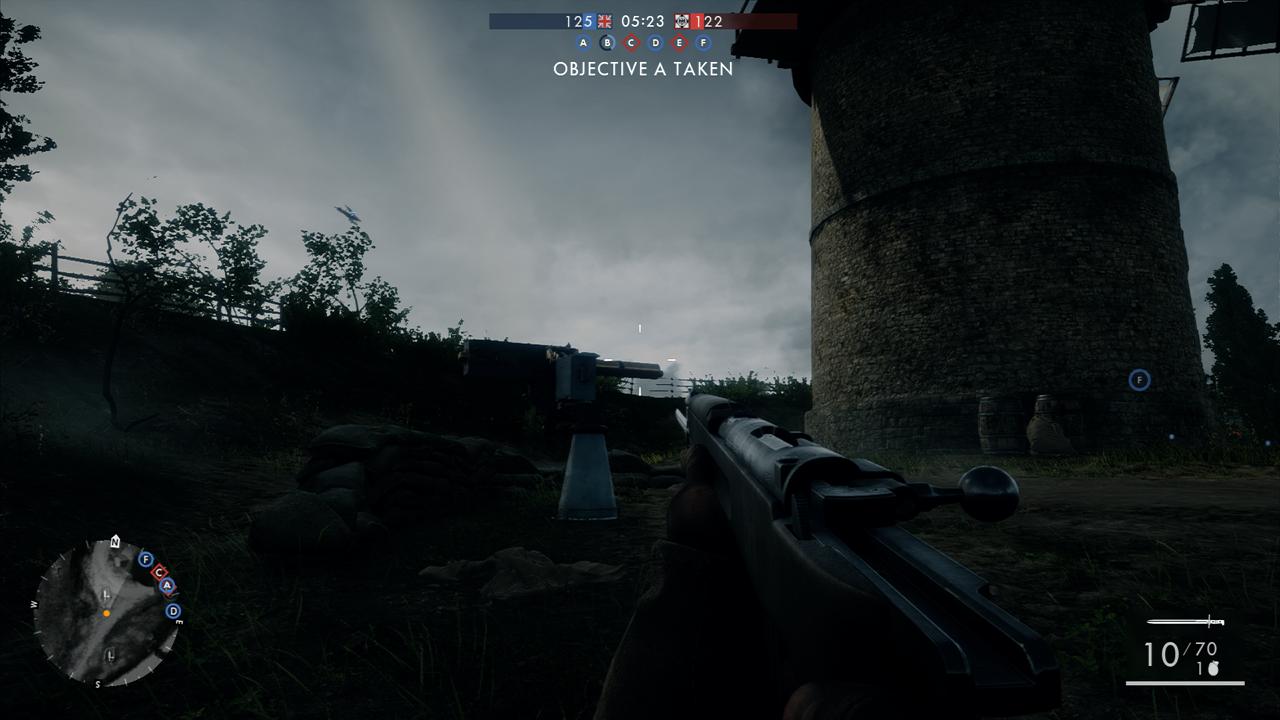
British Deployment #2; just to the right of the first AA. Like, seriously, they’re not in the same picture just because I chose to they’re so damn close. This one is better for actual AA Fire, as the windmill obscures it less than #1.
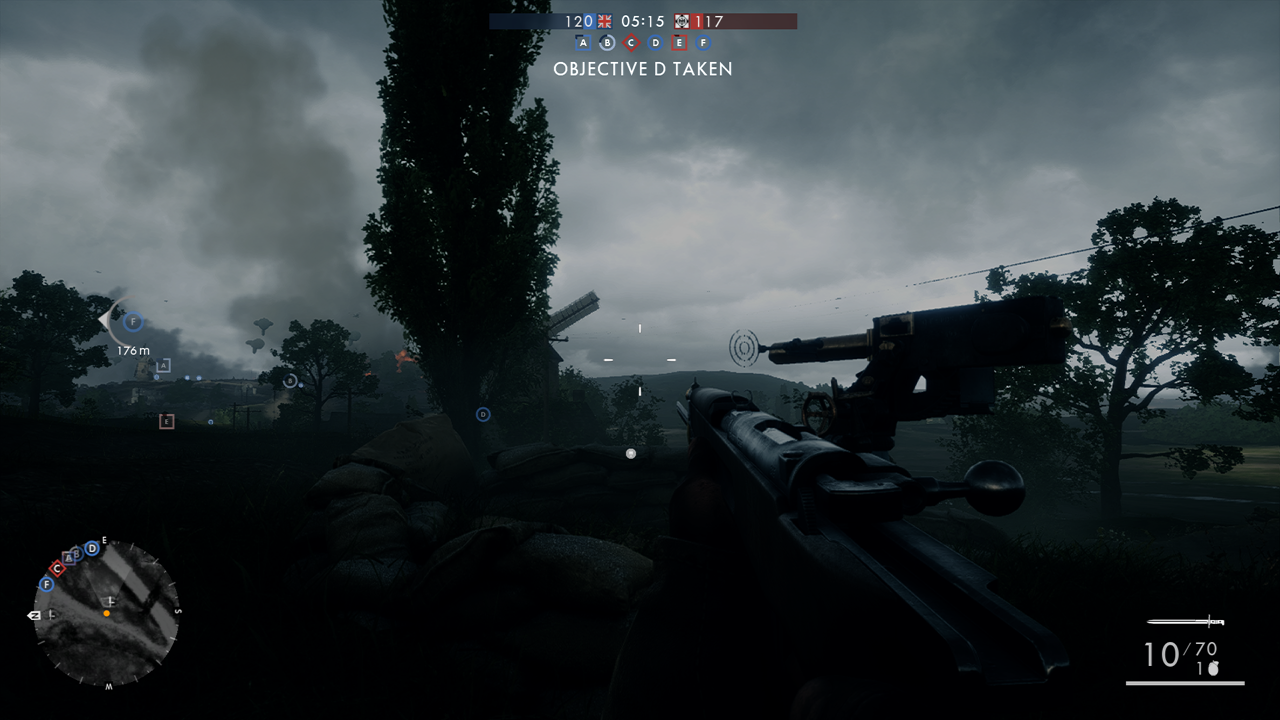
AA at F Flag; this sits just behind building that is behind the flag (when coming from the British Deployment).
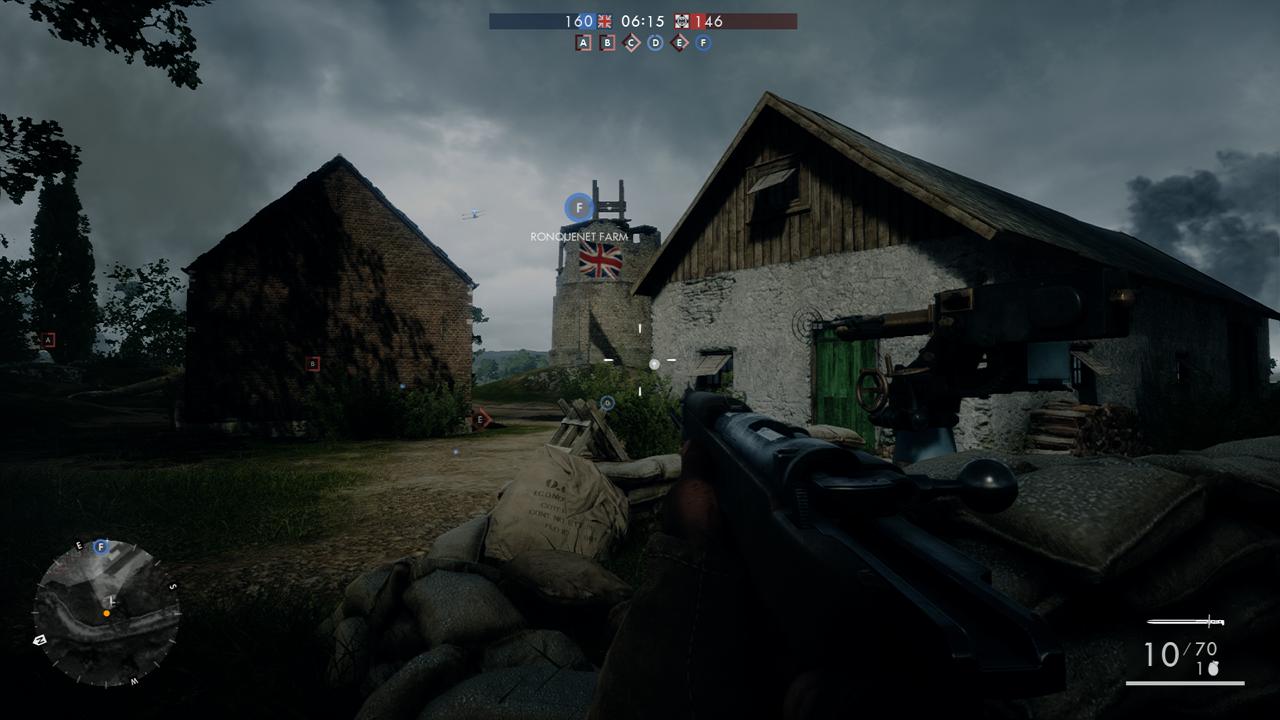
AA at C Flag; much like above, this AA Sits closer to the British Deployment than the German. It’s located just on the edge of the flag when coming from F.
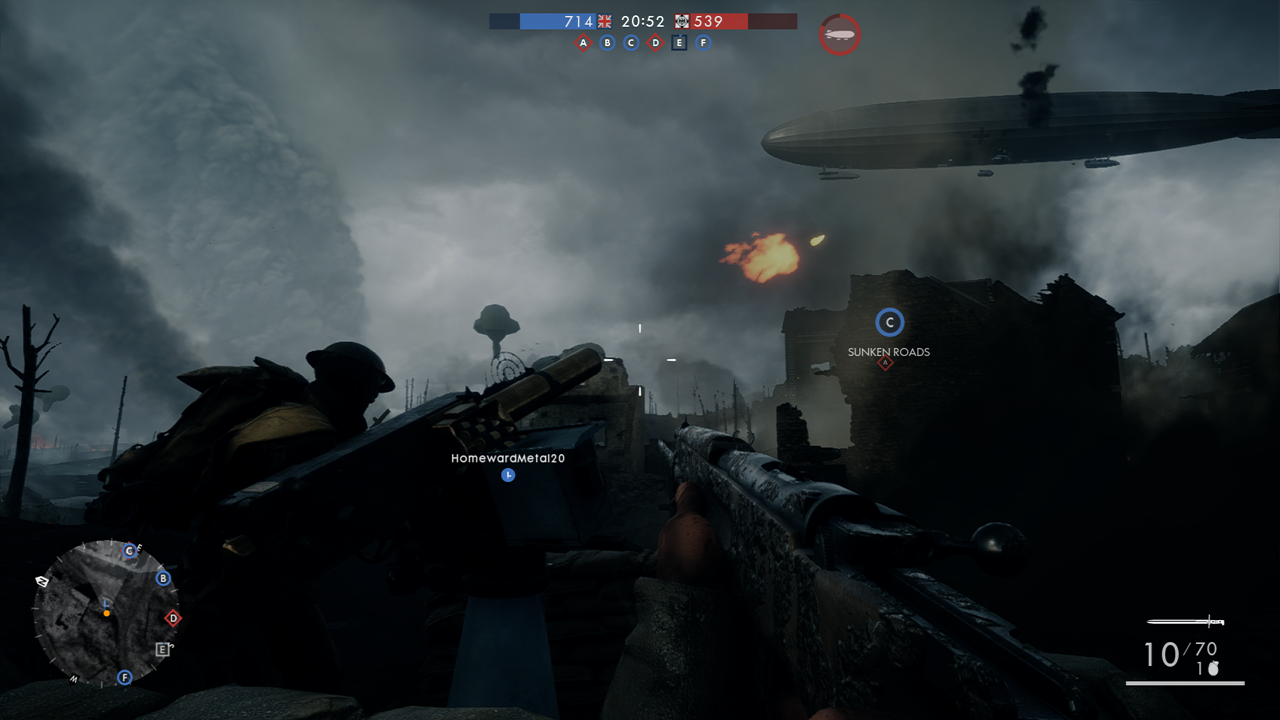
AA at B Flag; just behind the destroyed church. Really, can’t really miss it.
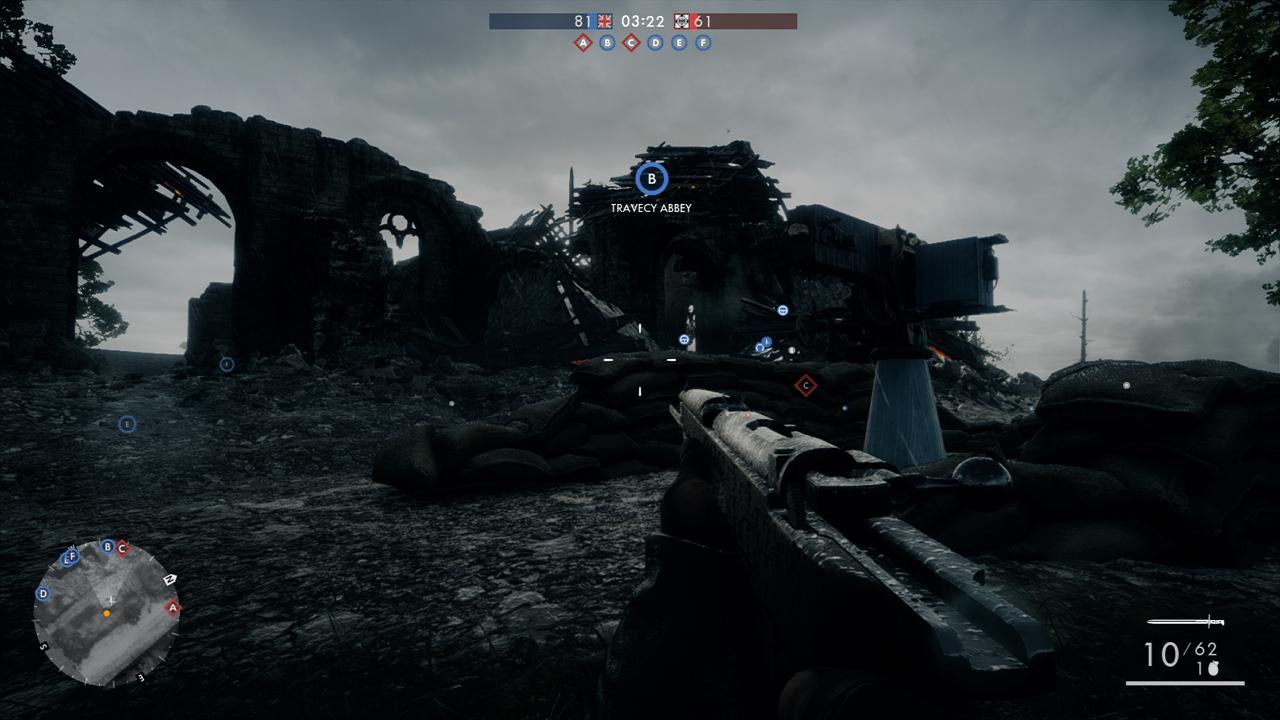
AA at A Flag; left side of the windmill when facing from the German Deployment. It sits right next to a few large piles of discarded shells.
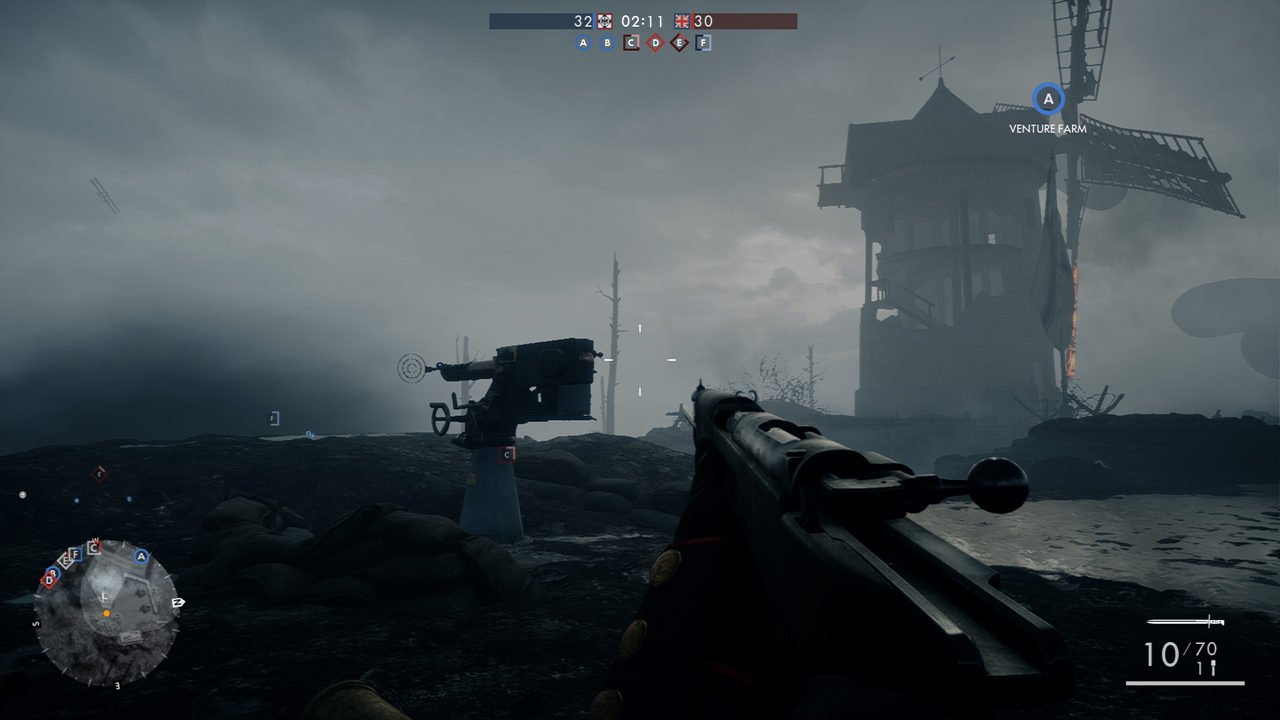
German Deployment #1; these two are kinda hard for me to really narrow down their position. For this one, just look for the burning Mark V Wreck.
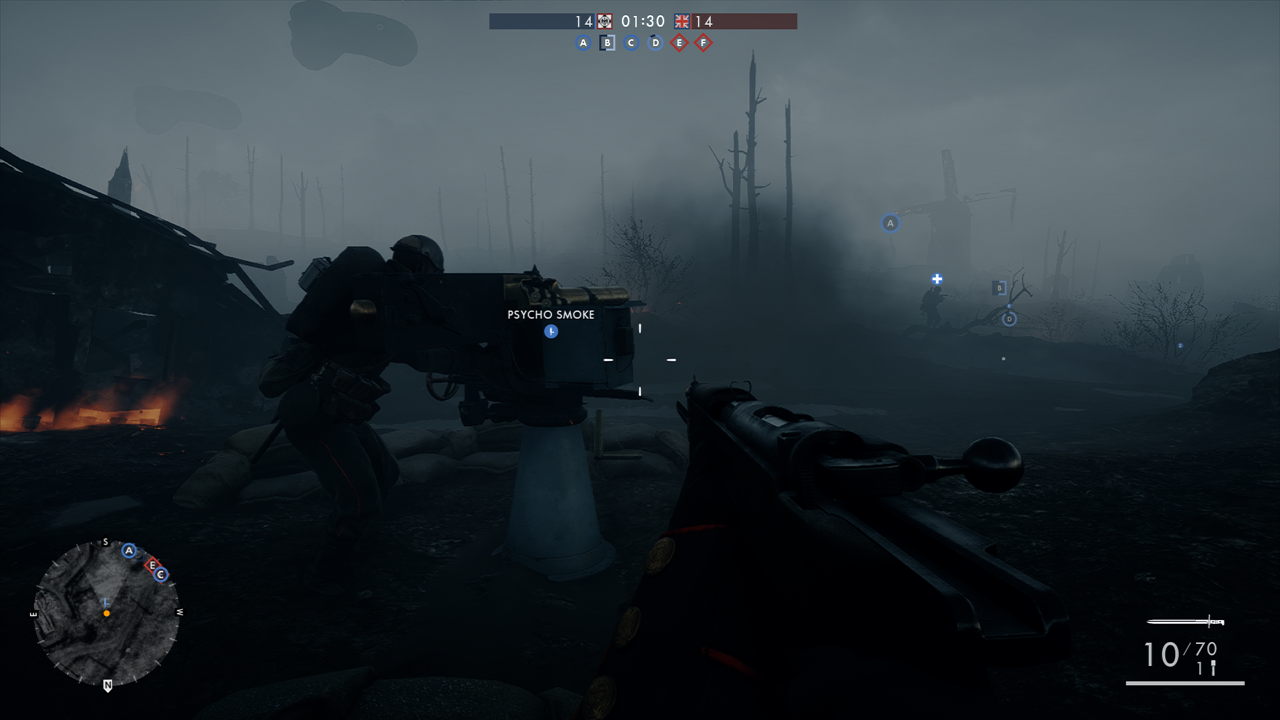
German Deployment #2; further left of where you found #1 Next to the burning Mark V Wreck, you’ll find this one. Sorry I can’t narrow it down better.
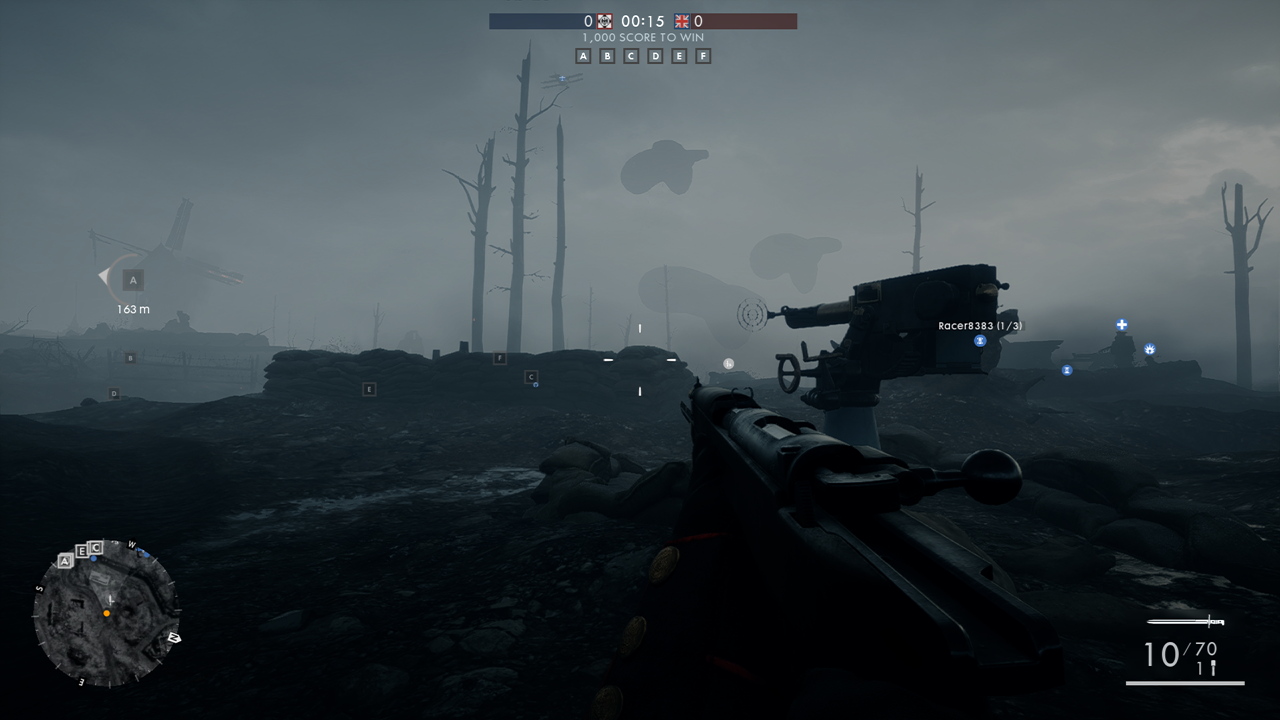
Just a sidenote; I find it odd that there is one at both B and C, but not one at D or E. I’m not sure if there should be one and I just missed it, as I tried numerous servers and would wait around both objectives constantly but never found one. If there is one at either objective, please inform me.
Monte Grappa:
Monte Grappa has 8 Stationary AA Guns. 2 Are located in each deployment, while the other 4 Are spread around the map. Here is the rough map of their locations;

And here are each of their specific locations:
Italian Deployment #1; this one sits behind the entrance to the church in a little trench dugout. This trench offers it decent protection against infantry fire IMO, so it would be a better choice than #2 From my perspective.
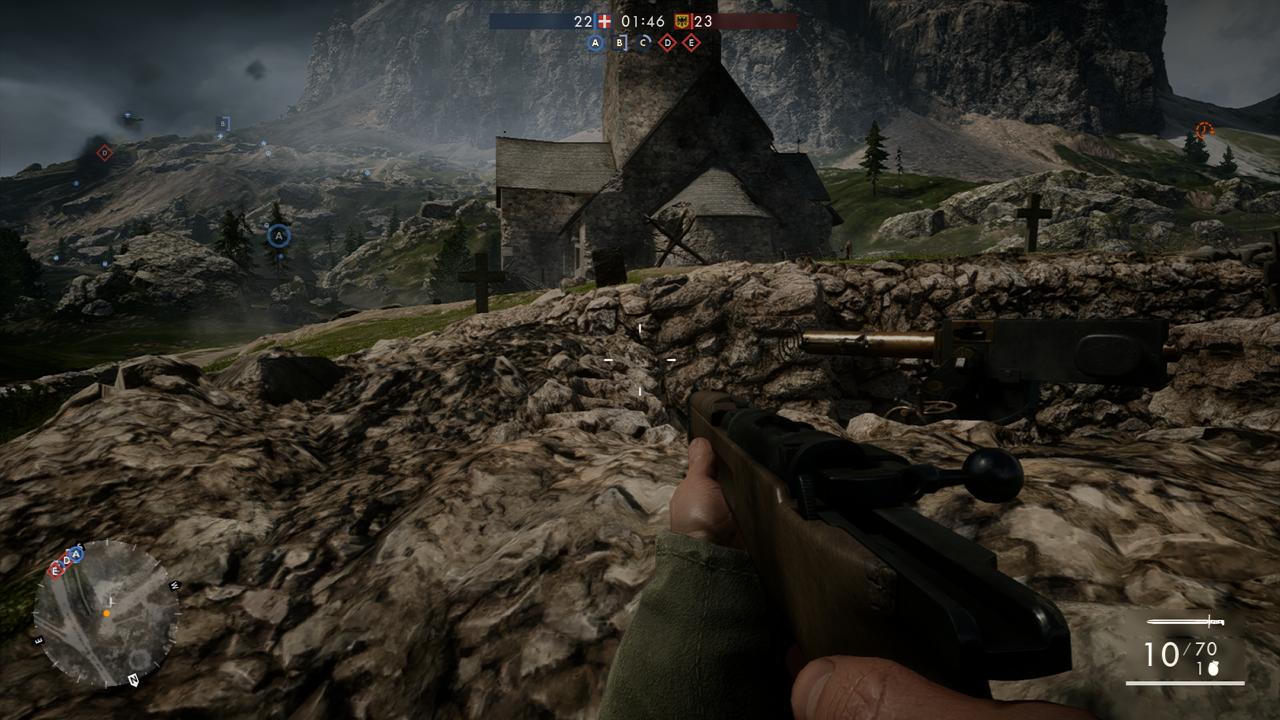
Italian Deployment #2; on the opposite side of the church on the left wall you’ll find this one just before A. It’s too open IMO To be really that effective except for early-game farming.
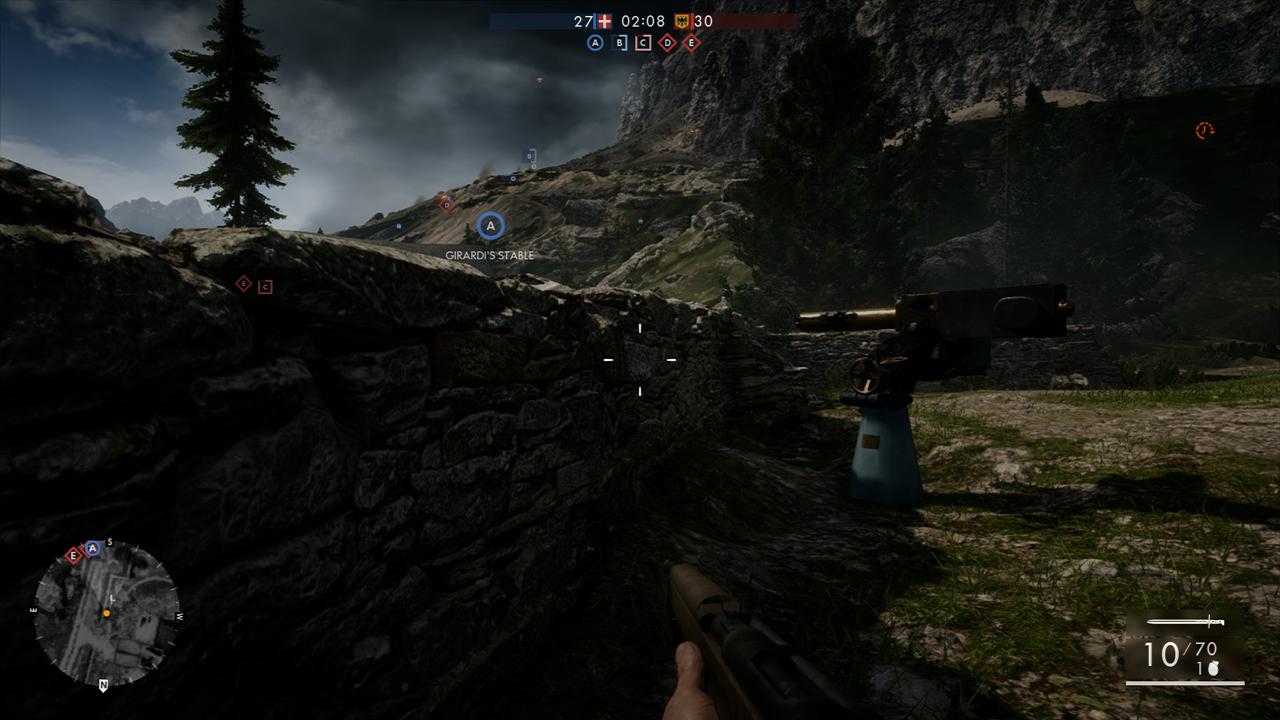
AA at A Flag; this one is actually further away from A Than the above, despite being basically linked to that flag. It’s located down the hill from A, just outside the building down there.
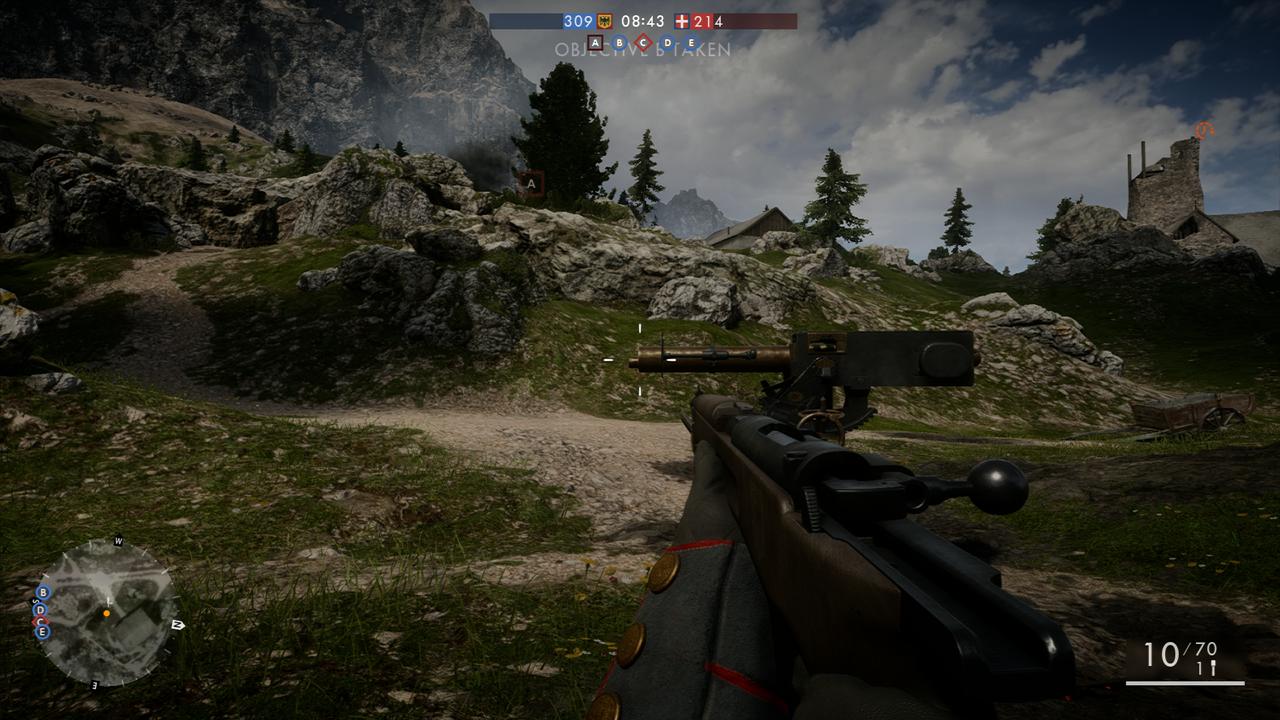
AA at B Flag; this sits just outside the exit facing D at B, on top of the hill. Not much else to say.
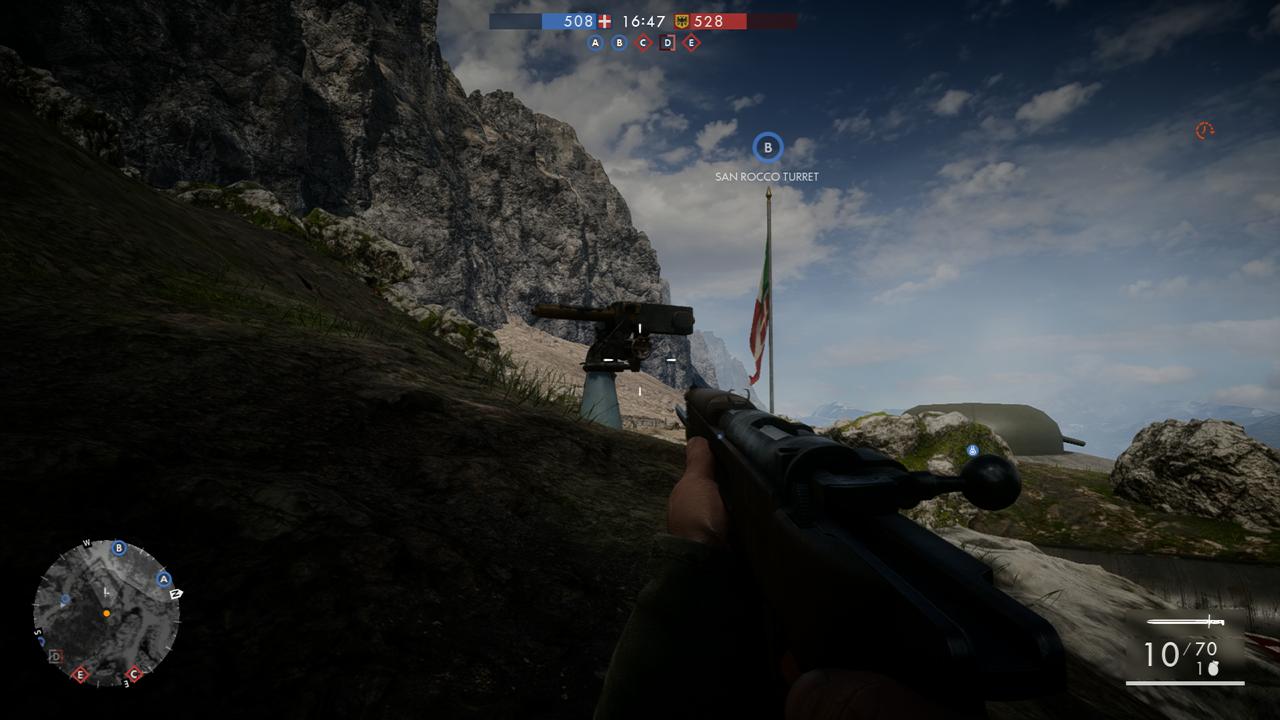
AA at D Flag; a bit like above, this sits just next to the flag at D, facing B.
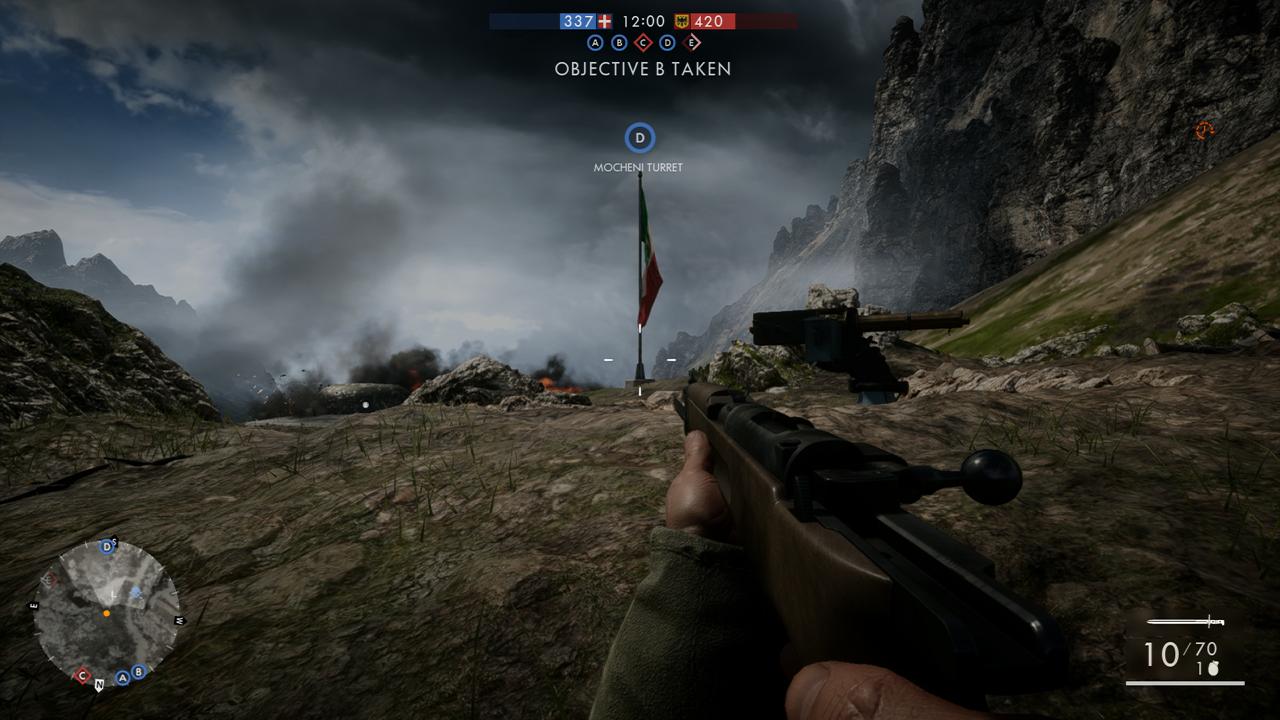
AA at E Flag; this AA Sits a bit behind E, just below the mountain in a little trench dugout.
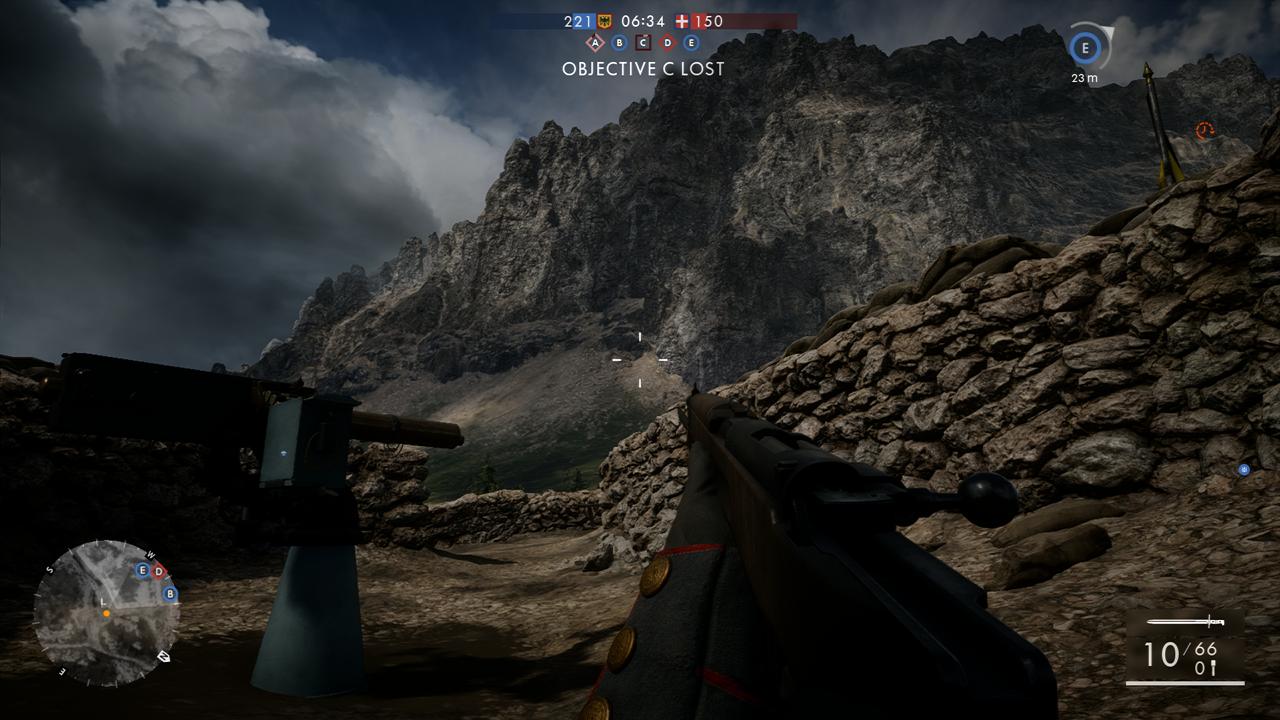
Austro-Hungarian Deployment #1; a bit like #2 For the Italians, this one sits surprisingly close to E And is rather exposed to infantry. If someone is already on the AA At E And you’re playing the Austro-Hungarians, it’s not much of a sprint to get to this one if you really need to.
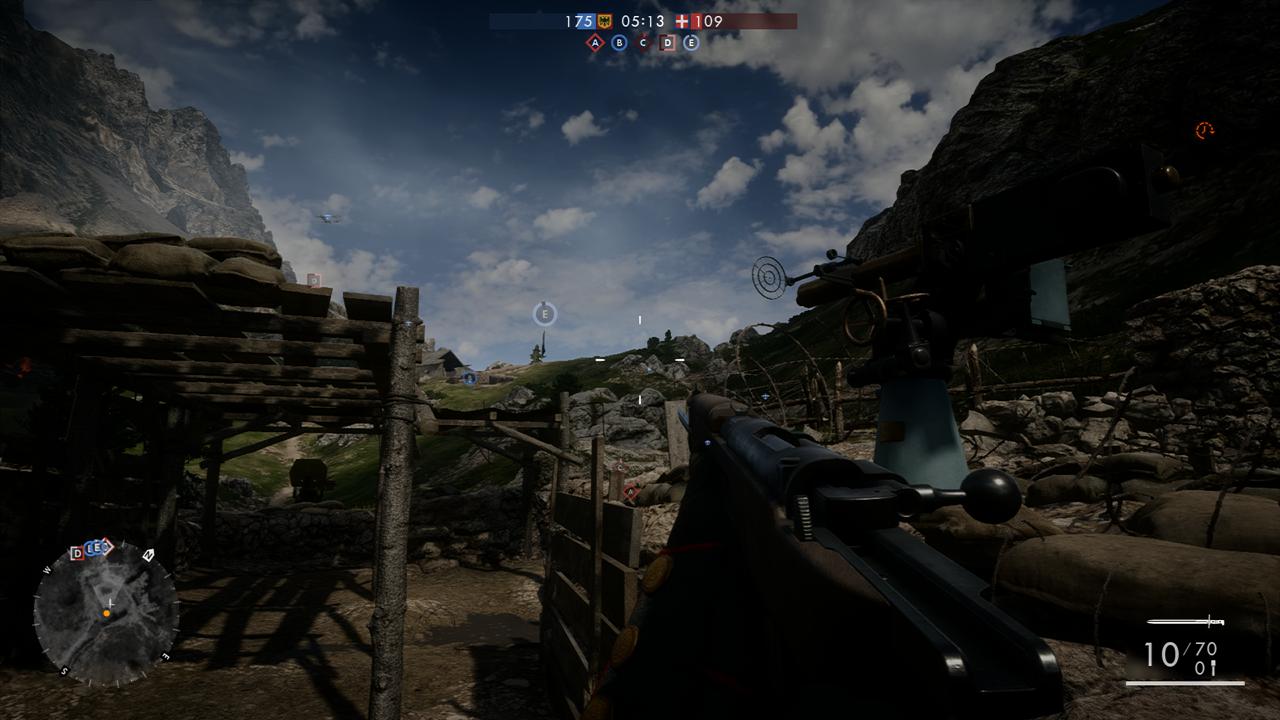
Austro-Hungarian Deployment #2; just behind the bridge in the Austro-Hungarian Deployment, on top of a sheltered trench. Like above, it’s pretty open.

Fao Fortress:
Fao Fortress has 4 Stationary AA Guns. 2 Are located at the Fortress itself, and 1 is at both A and G Respectively. Here is the rough map of their locations;
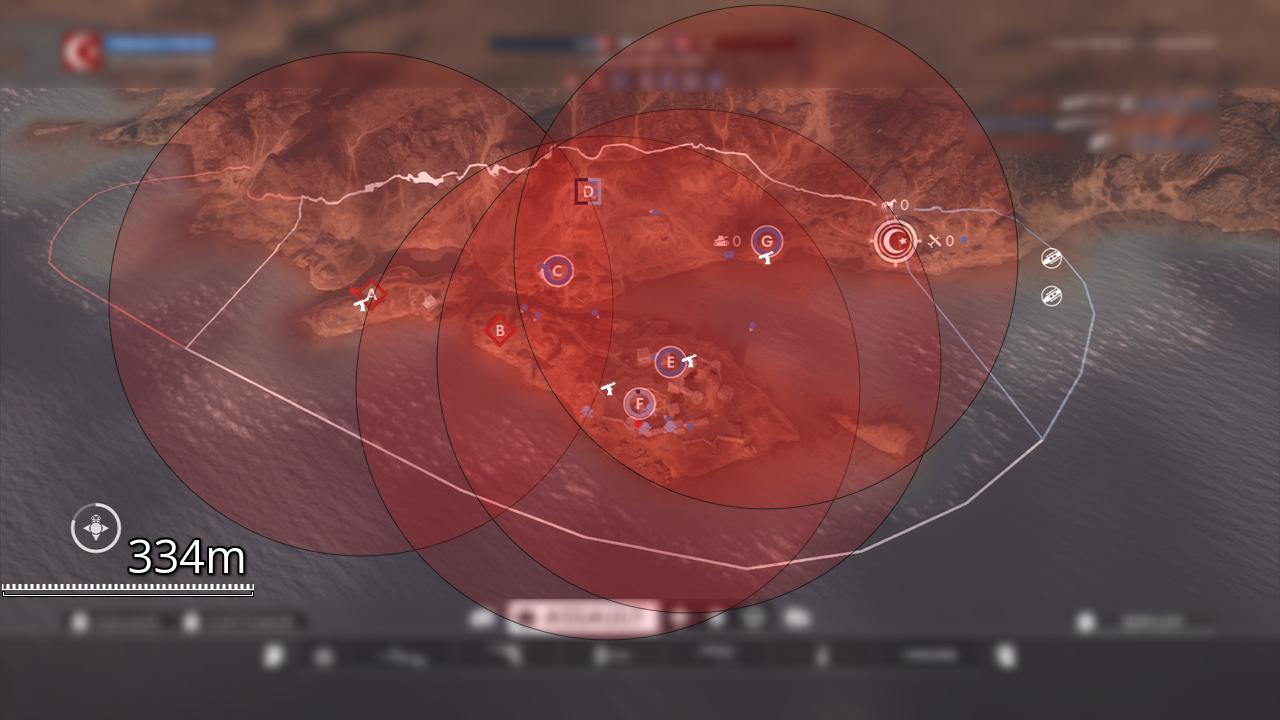
And here are each of their specific locations:
AA at A Flag; right next to the flag, really all there is to it.
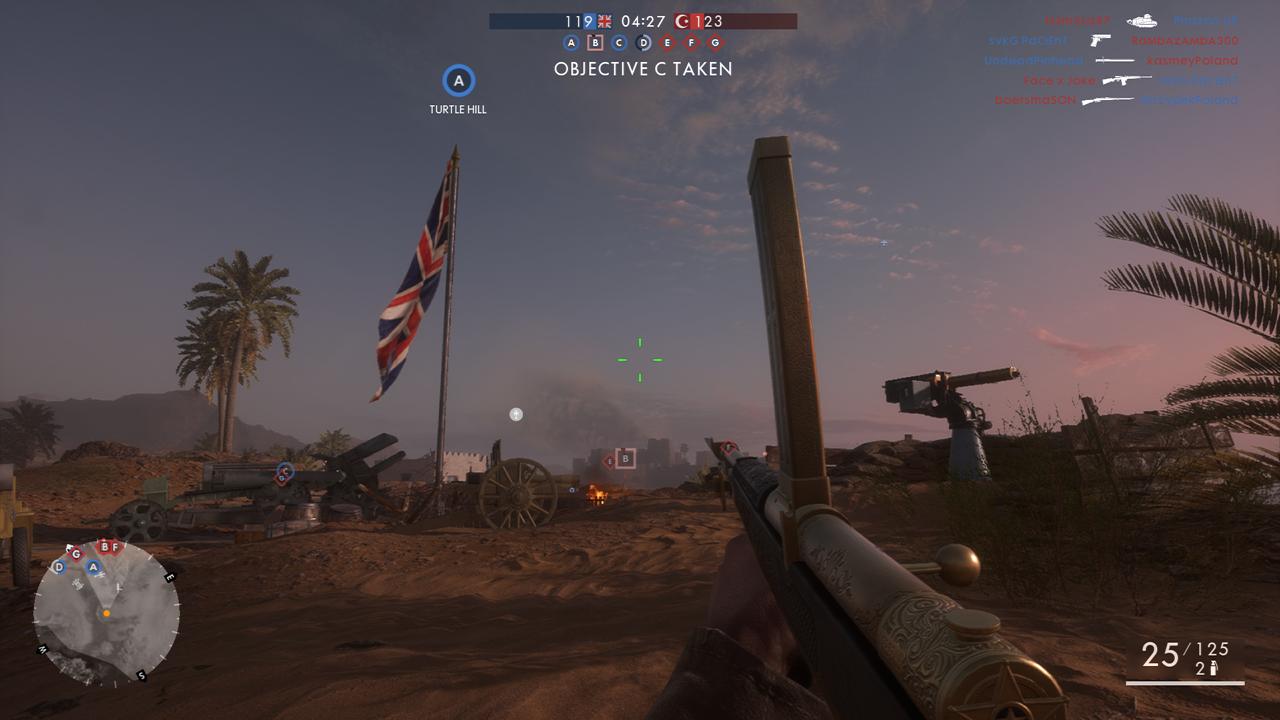
AA at E Flag; this AA Sits atop the wall above E, on the tower facing towards G. The walls over some protection against snipers that aren’t at the very top of the cliffs at say, D, but is an inviting target for planes I find.
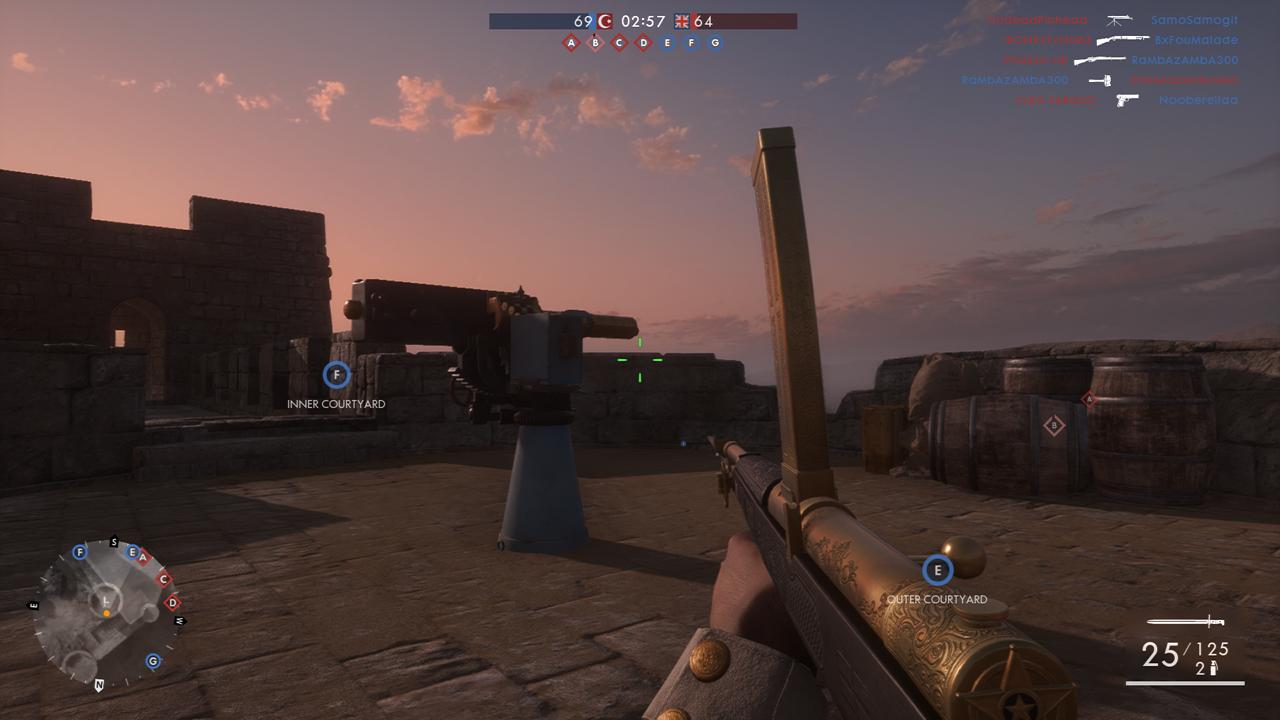
AA at F Flag; behind the Field Gun, facing towards B.
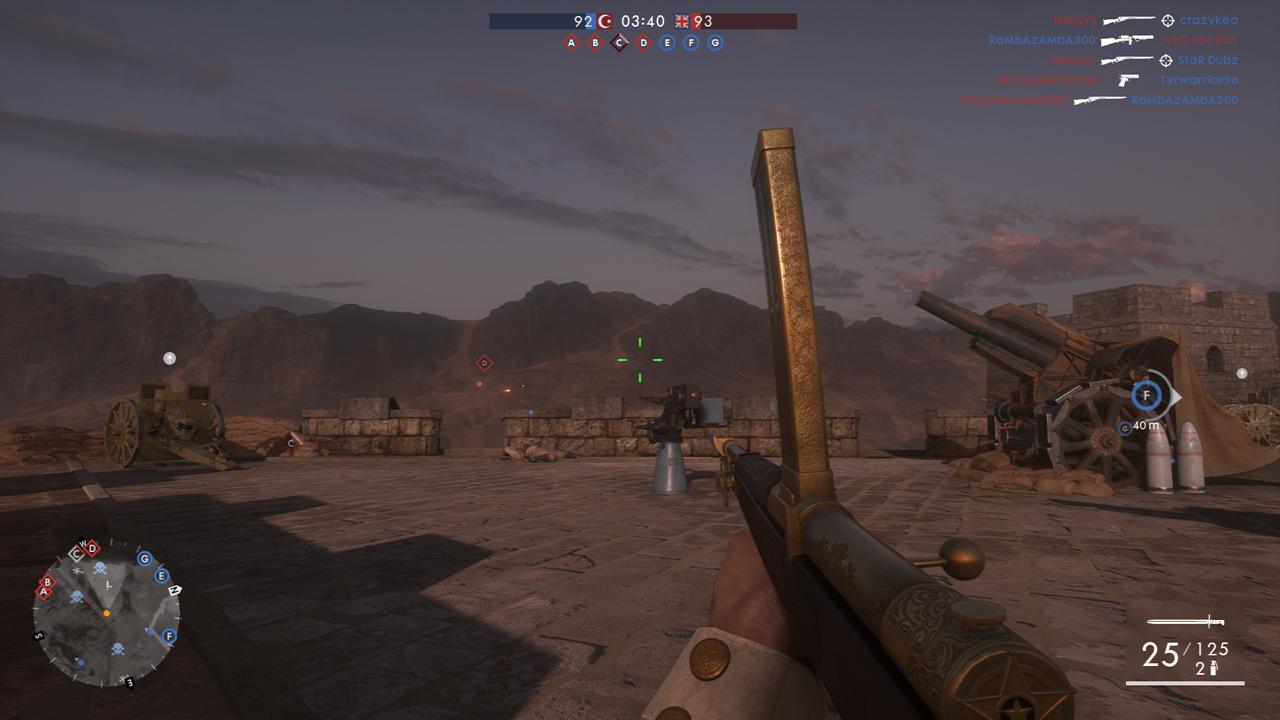
AA at G Flag; just like A, this one is right next to the flag at G. Nothing else.
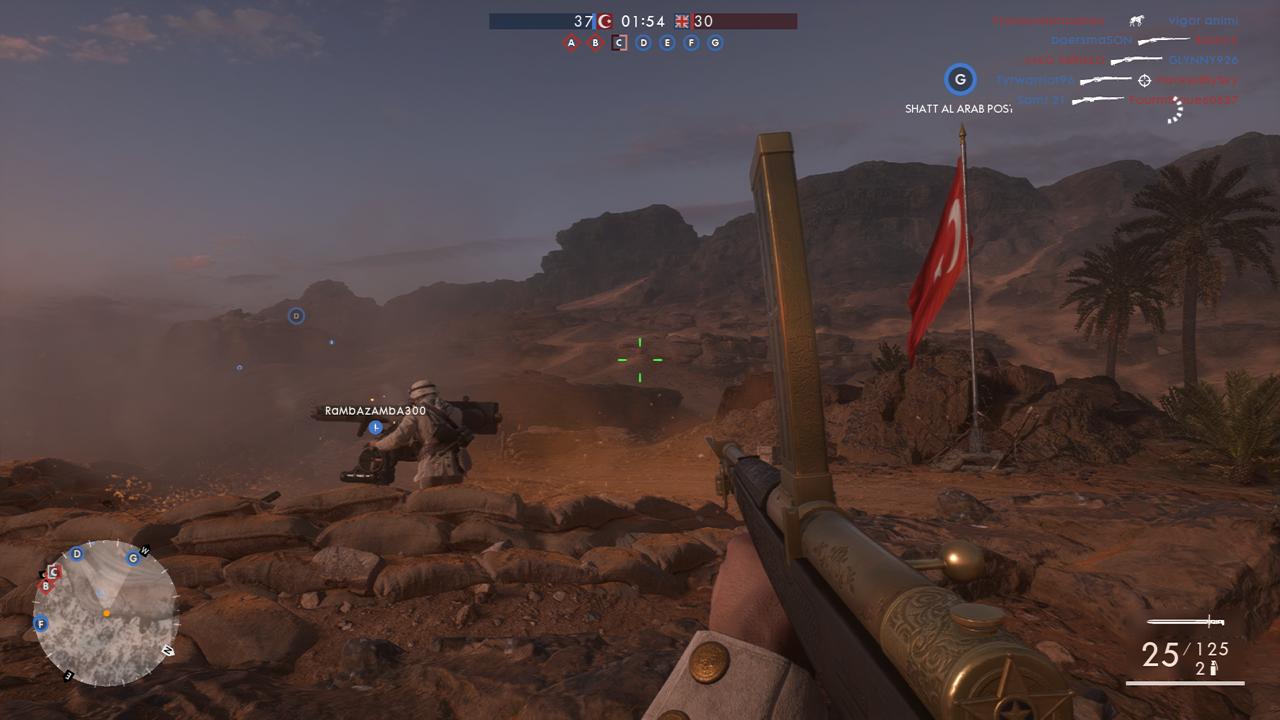
Ballroom Blitz:
Ballroom Blitz has 6 Stationary AA Guns. 1 Is located at E, near the German deployment, while 4 Are spread around C and 1 Final AA Is located at A, near the American deployment. Here is the rough map of their locations;
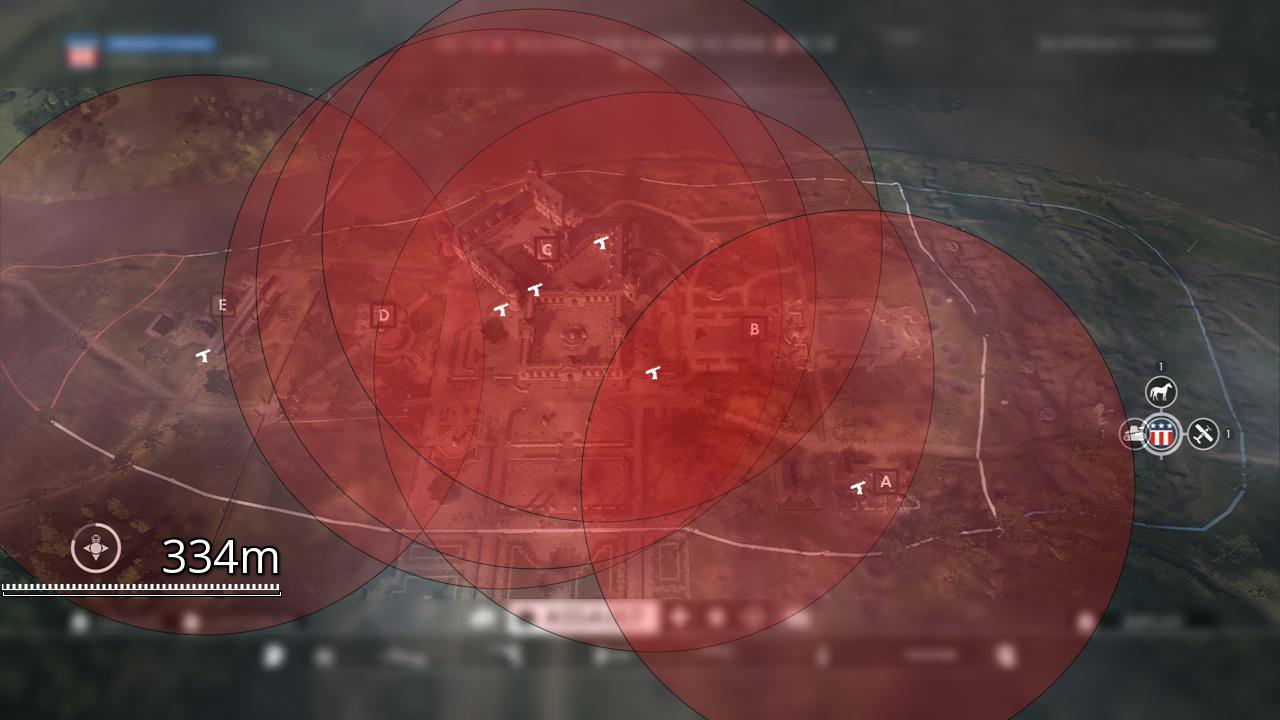
And here are each of their specific locations:
AA at E Flag; right side of E From the German Deployment, at the end of the platform. There is a Field Gun on the opposite side of the platform, just for reference.
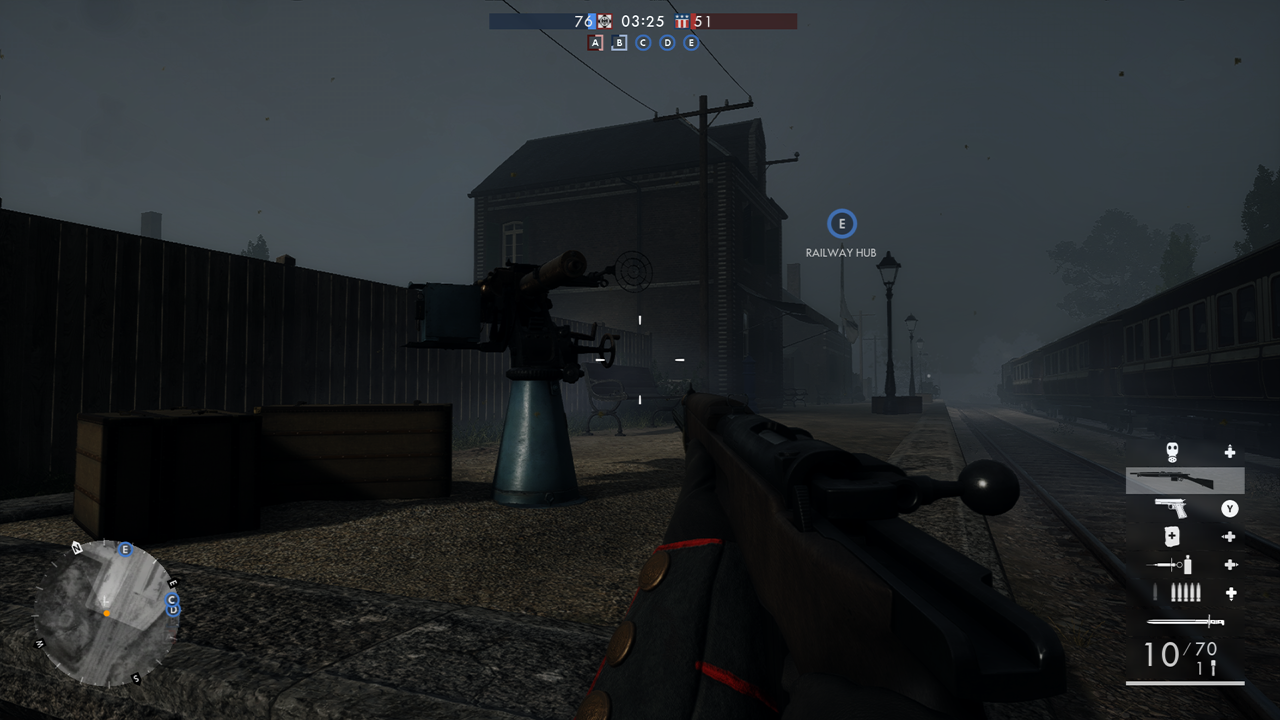
AA at C Flag #1; the first of the 4 AAs at C. This sits just below the “sniper wall” as I like to call it, just above the small corridor entrance to C from D.
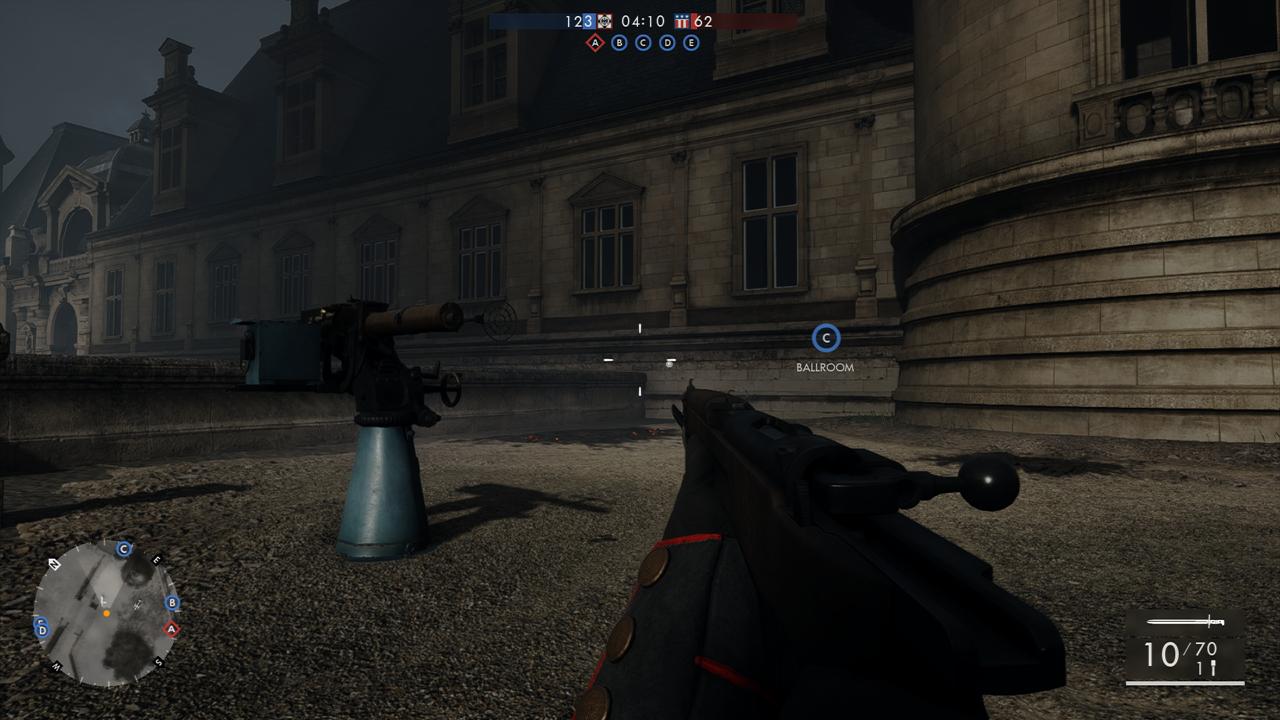
AA at C Flag #2; assuming you come into C From the aforementioned small corridor entrance to C, you’ll find this AA Sitting just to the right outside the door.
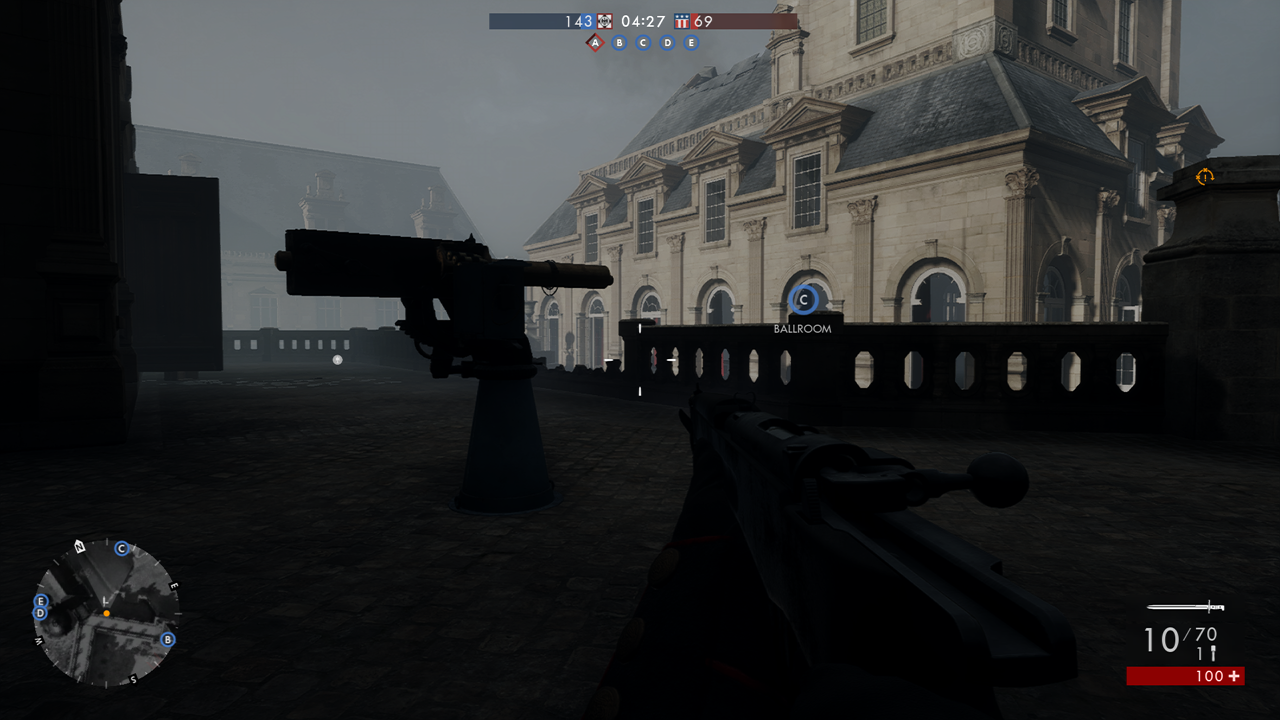
AA at C Flag #3; pretty much opposite from #2, this is just outside the corridors that cover C Facing towards B. This area is pretty heated most games, so I wouldn’t use this unless you know it’s clear.
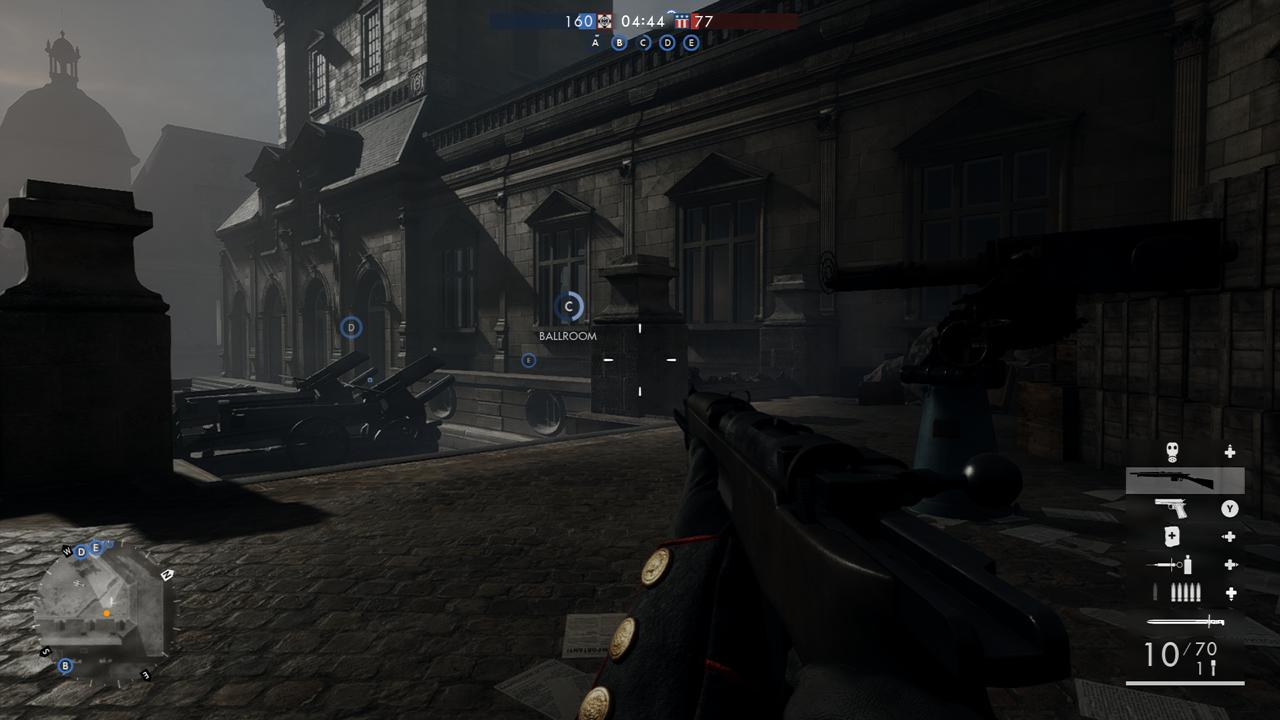
AA at C Flag #4; below the sniper wall from the courtyard, facing B.
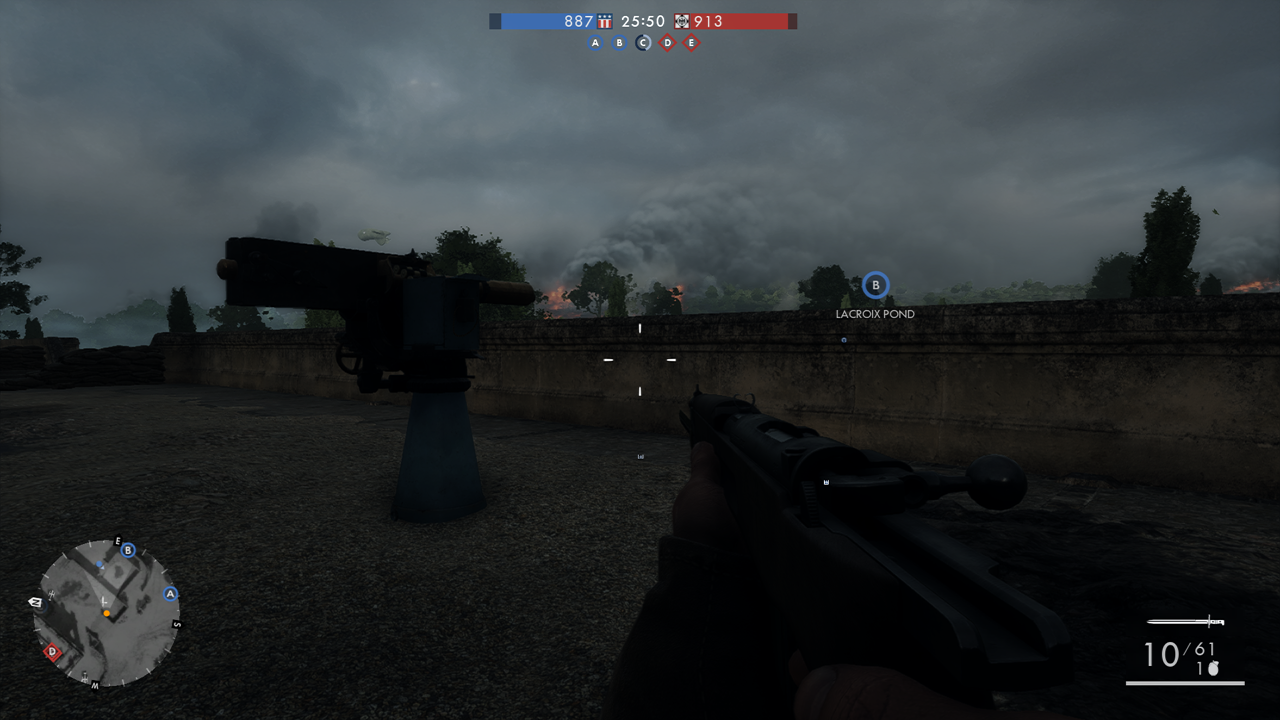
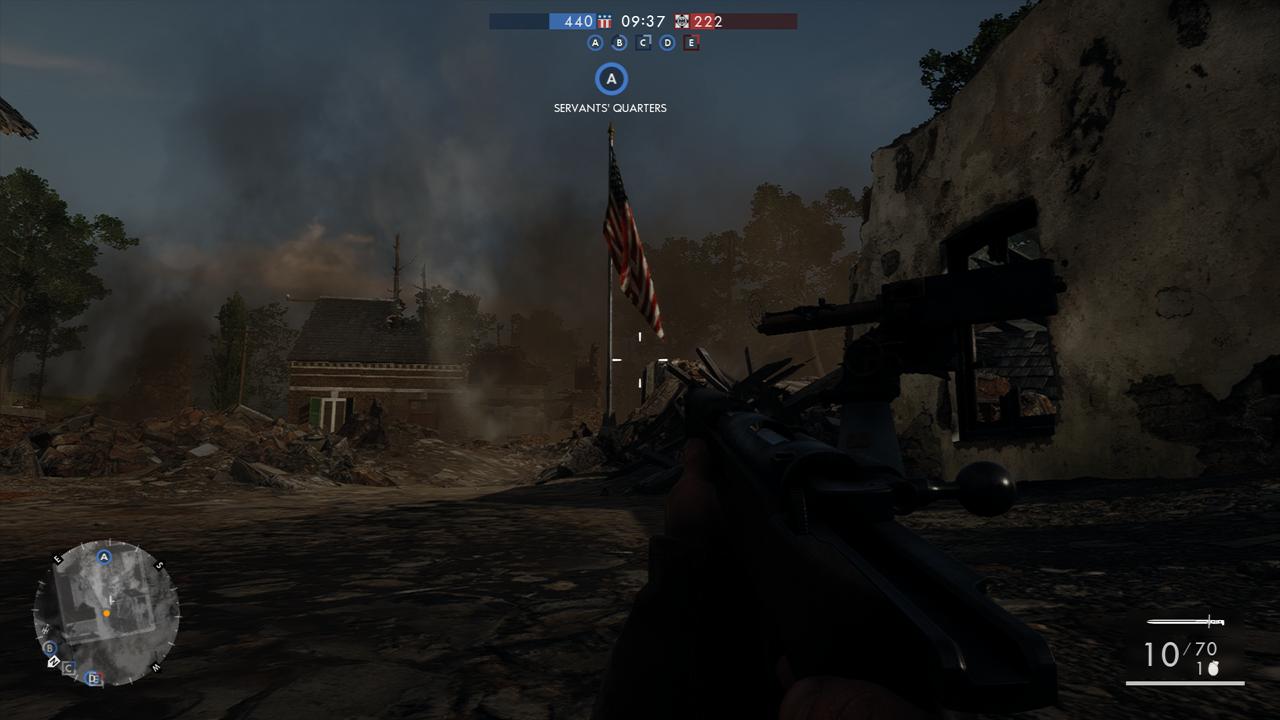
AA at A Flag; just in front of the flag next to one of the destroyed buildings.
Empire’s Edge:
Empire’s Edge has 9 Stationary AA Guns from what I can tell. They are spread across the whole map, with 6 Of them covering the centre of the map. Here is the rough map of their locations;
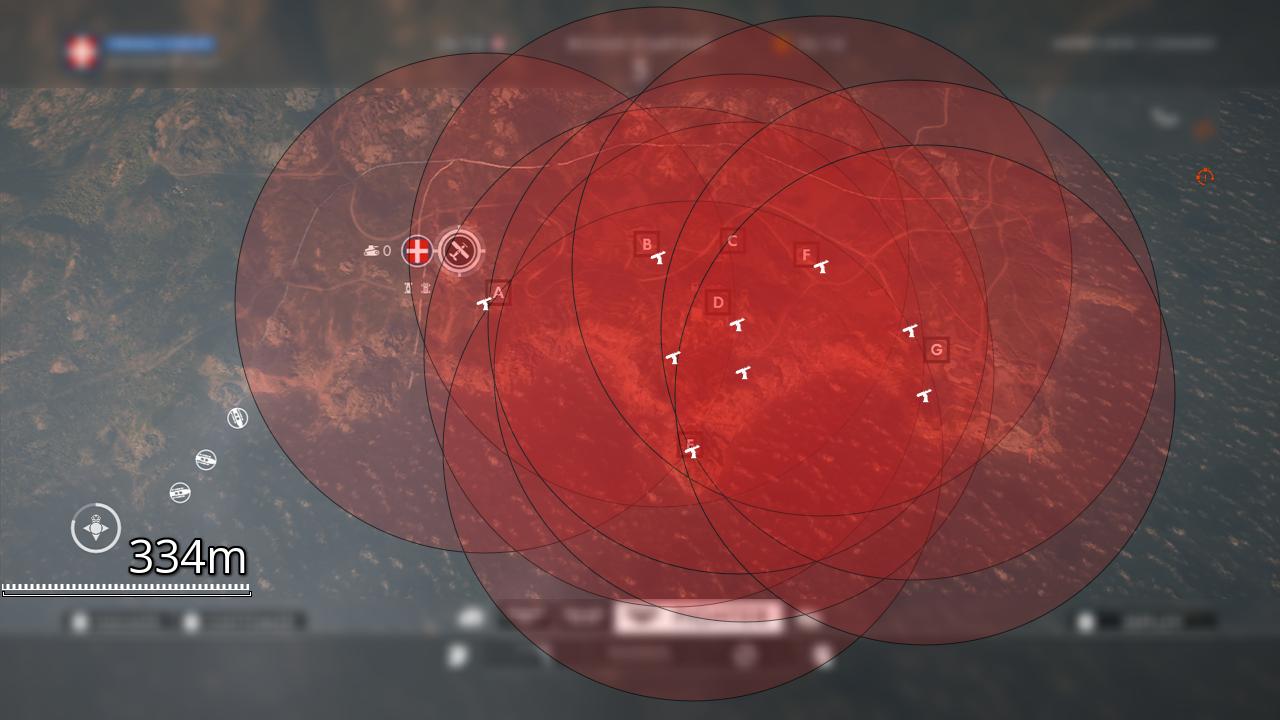
And here are each of their specific locations:
AA at A Flag; the first of 9 (!) AA Guns on Empire’s Edge. This one is just outside the first door to A From the Italian Deployment.

AA at B Flag; at the end of the courtyard, facing the buildings. Not much else.
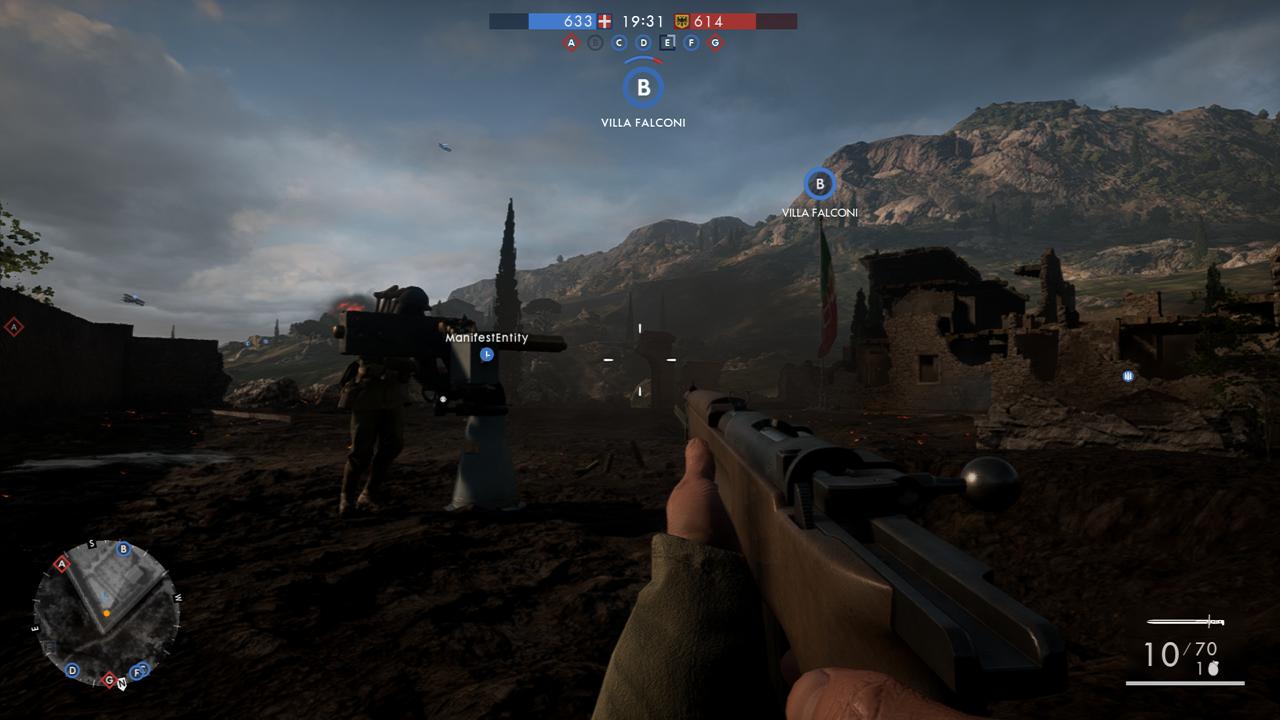
AA at D Flag #1; next to the the Siege Gun on the Italian side of D, down the hill a bit.
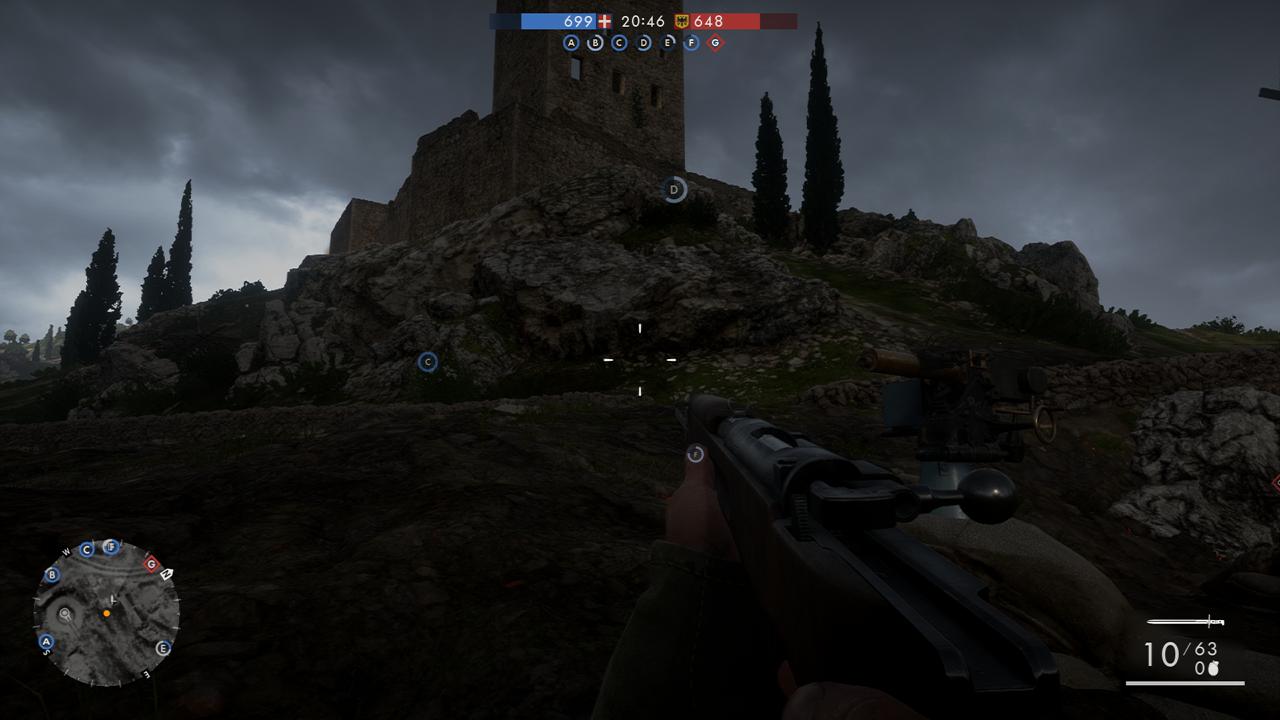
AA at D Flag #2; ditto above, but on the Austro-Hungarian side.
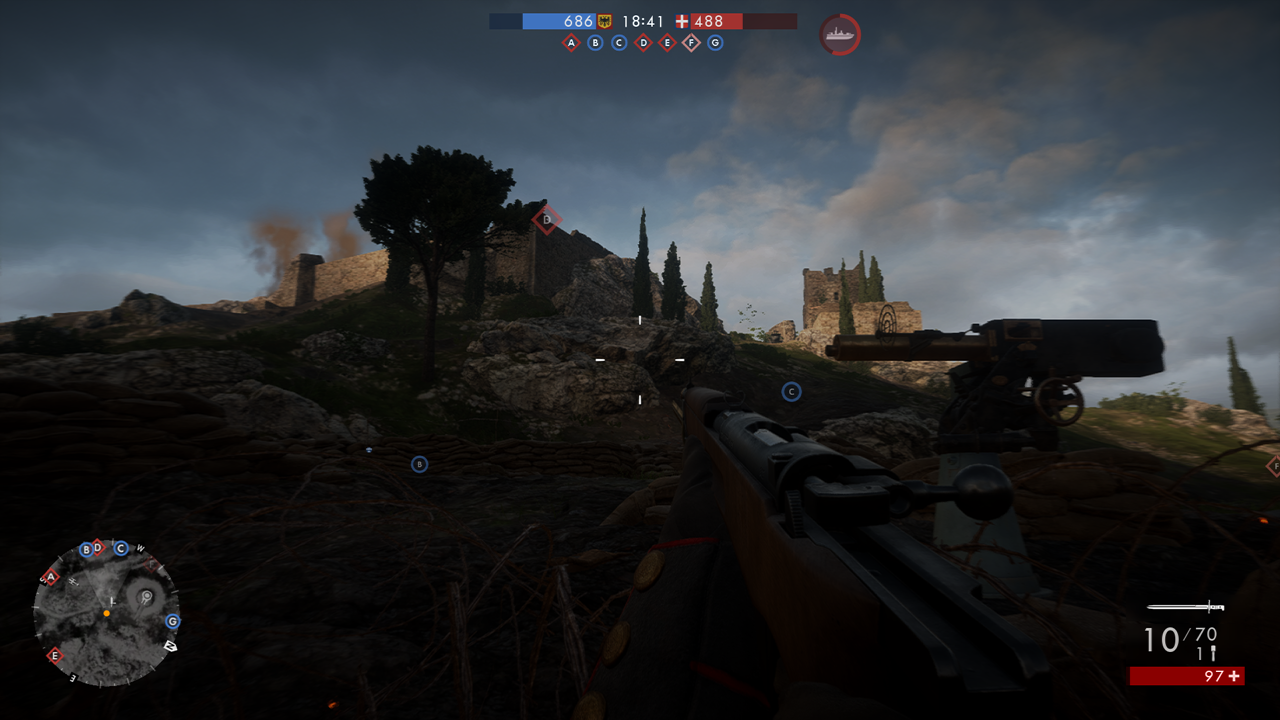
AA at D Flag #3; directly below D on the Austro-Hungarian side is this AA, located just next to one of the many sniper towers there.
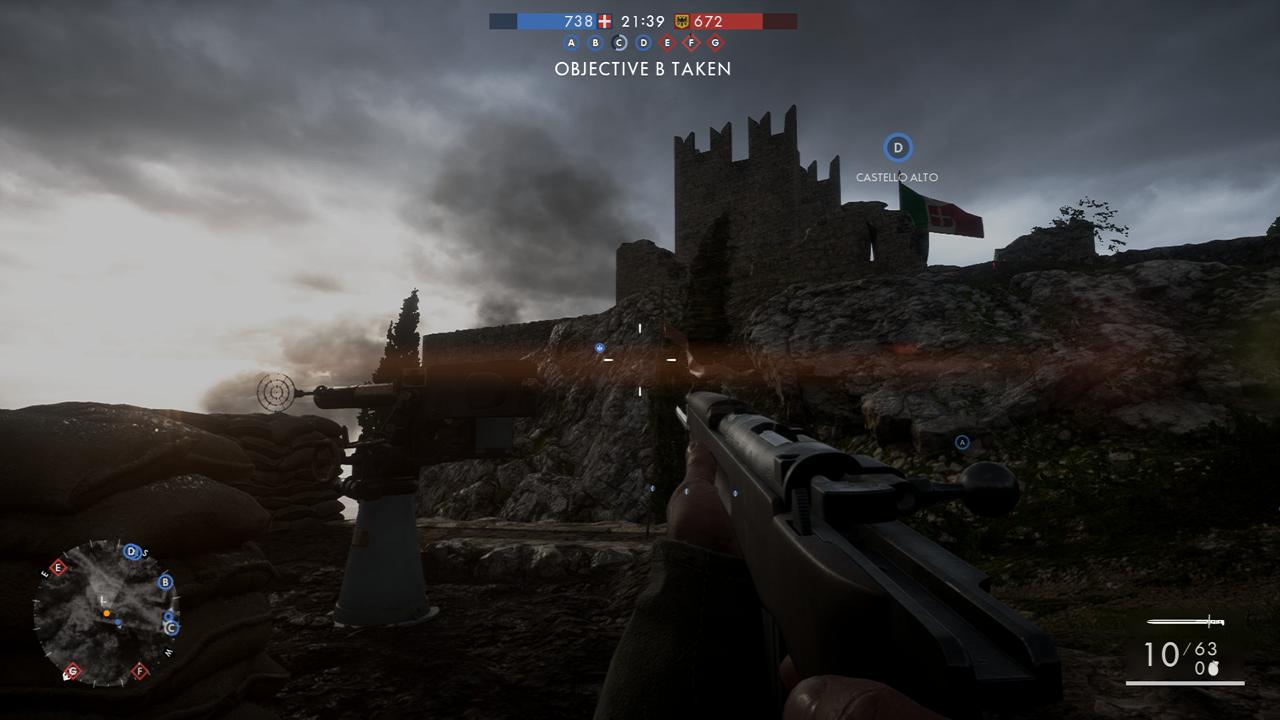
AA at E Flag; you can probably touch the flag with the tip of your gun if you know what I mean. ( ͡° ͜ʖ ͡°)
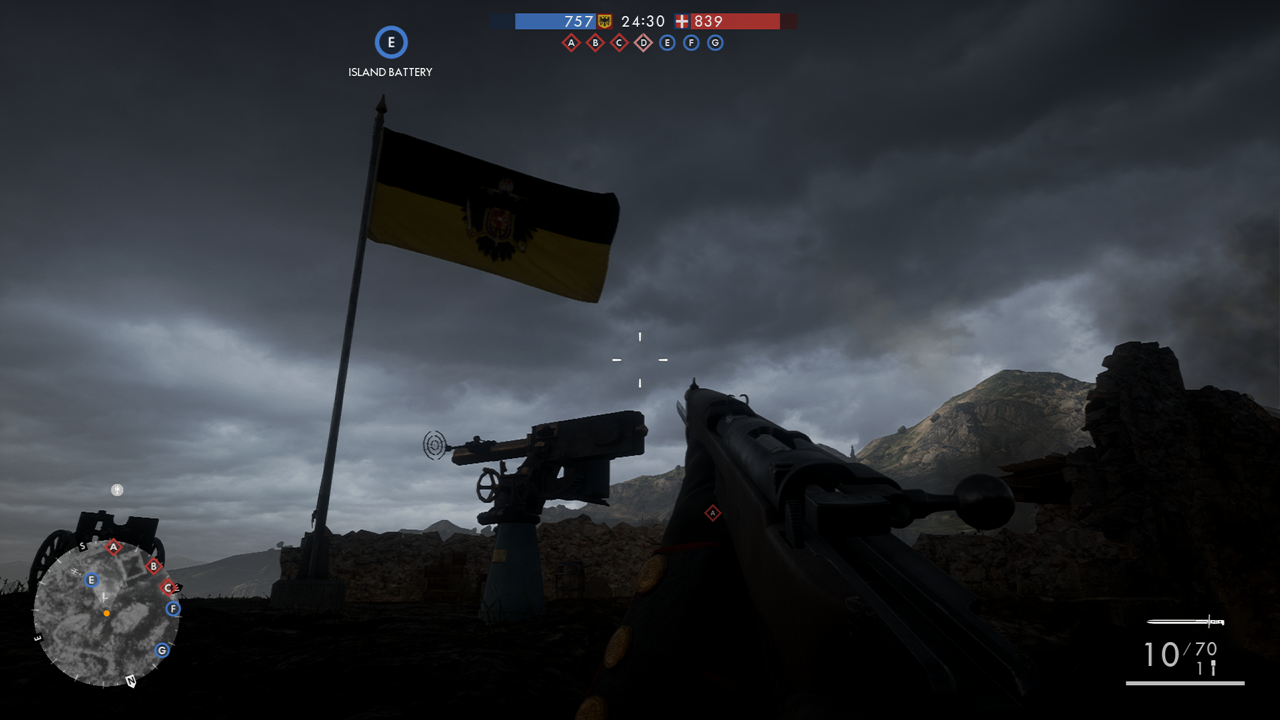
AA at F Flag; behind the building, facing G.
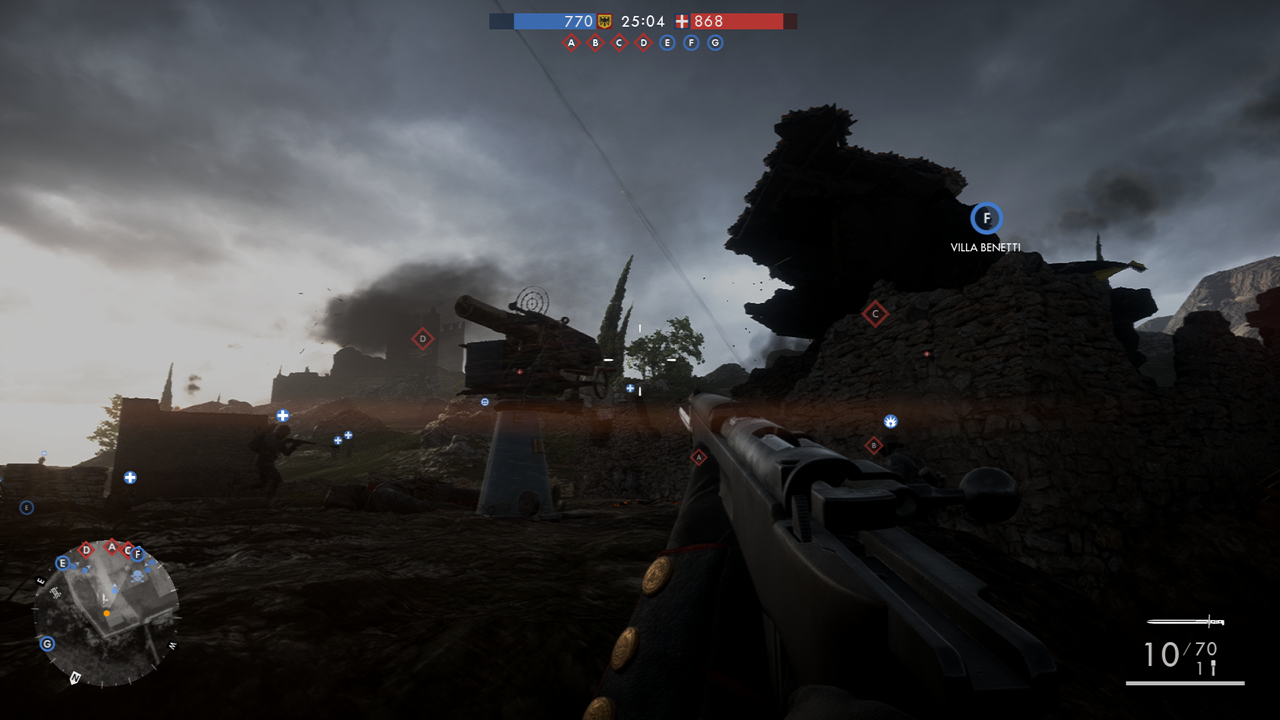
AA at G Flag #1; directly on the ramparts outside of G.
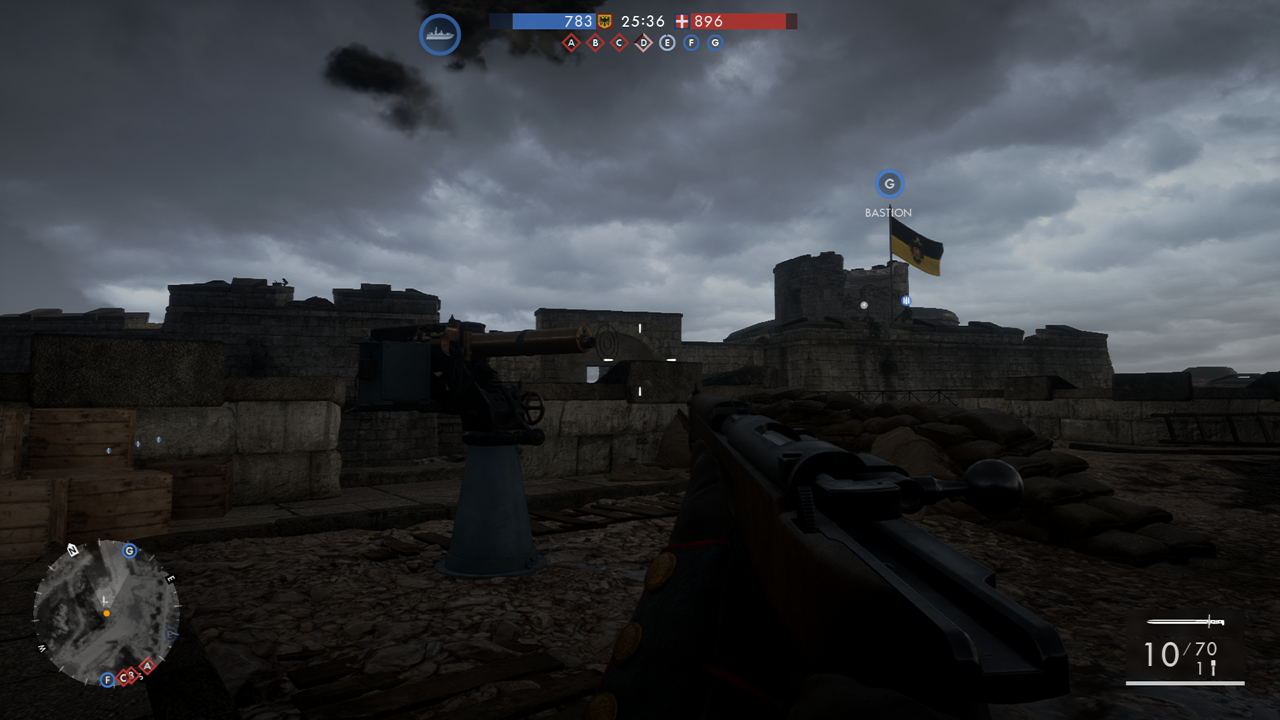
AA at G Flag #2; I’ve pretty much never seen anyone use this one. It sits on the wall of G Facing south (?), right next to the Siege Gun there.
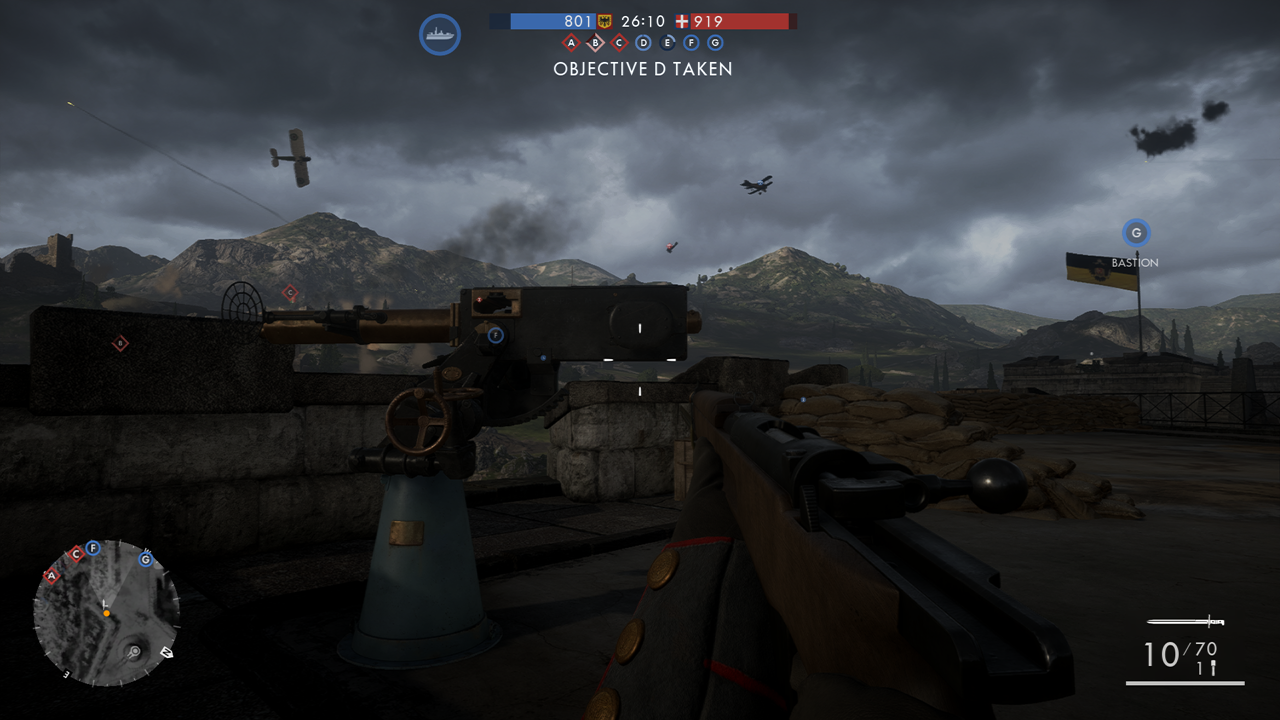
Sinai Desert:
Sinai Desert has 4 Stationary AA Guns from what I can tell. There is 1 at C, D and 2 at G Respectively. Here is the rough map of their locations;
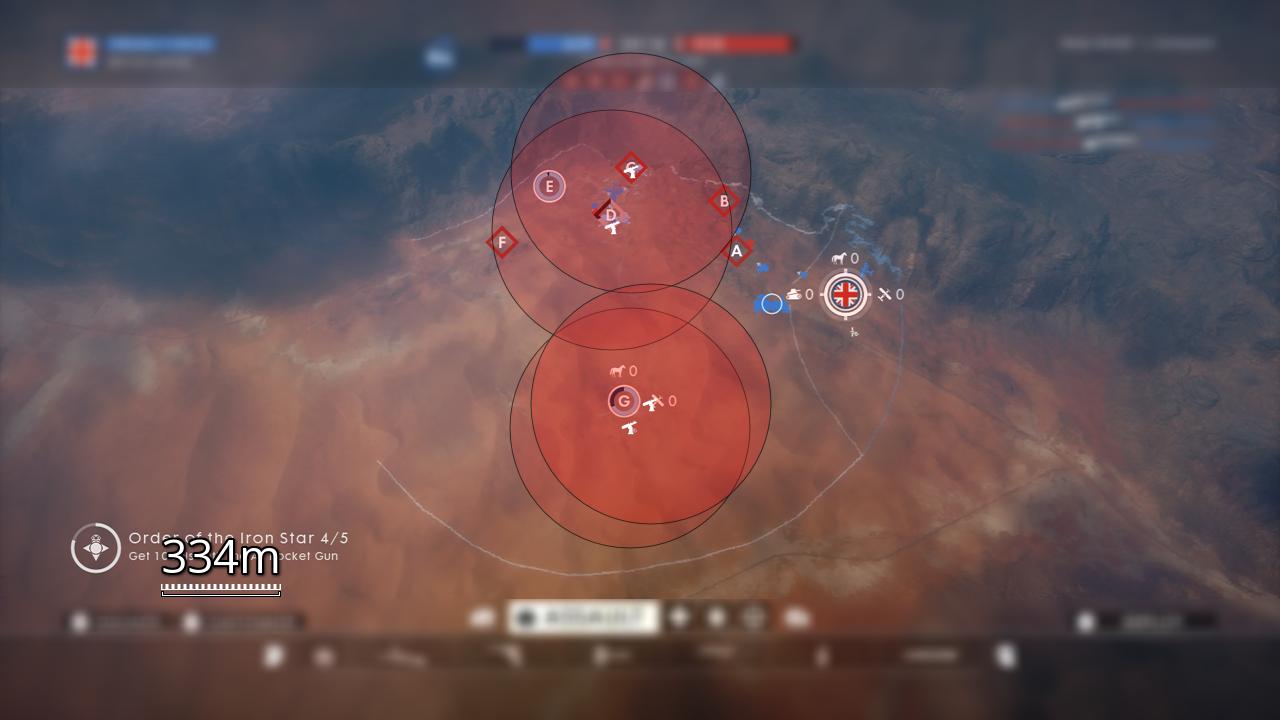
And here are each of their specific locations:
AA at C Flag; like many above, it’s right next to the C Flag.
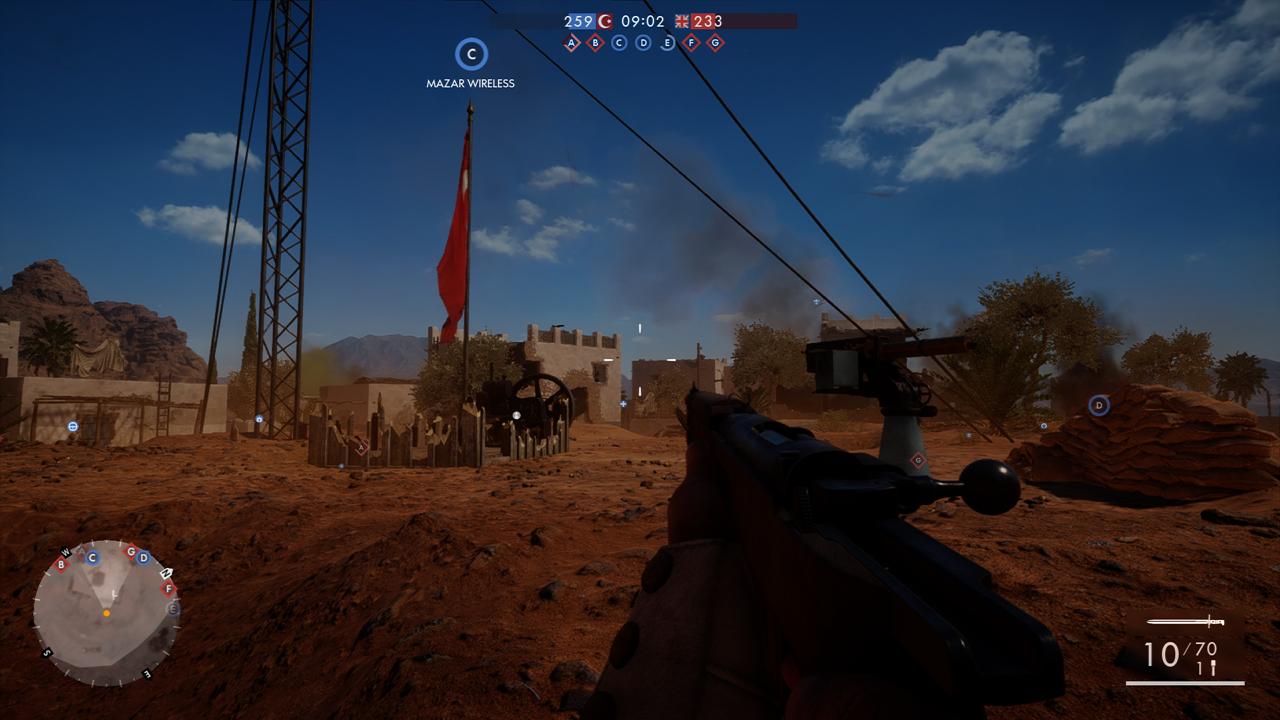
AA at D Flag; behind the trains, southwards at D.
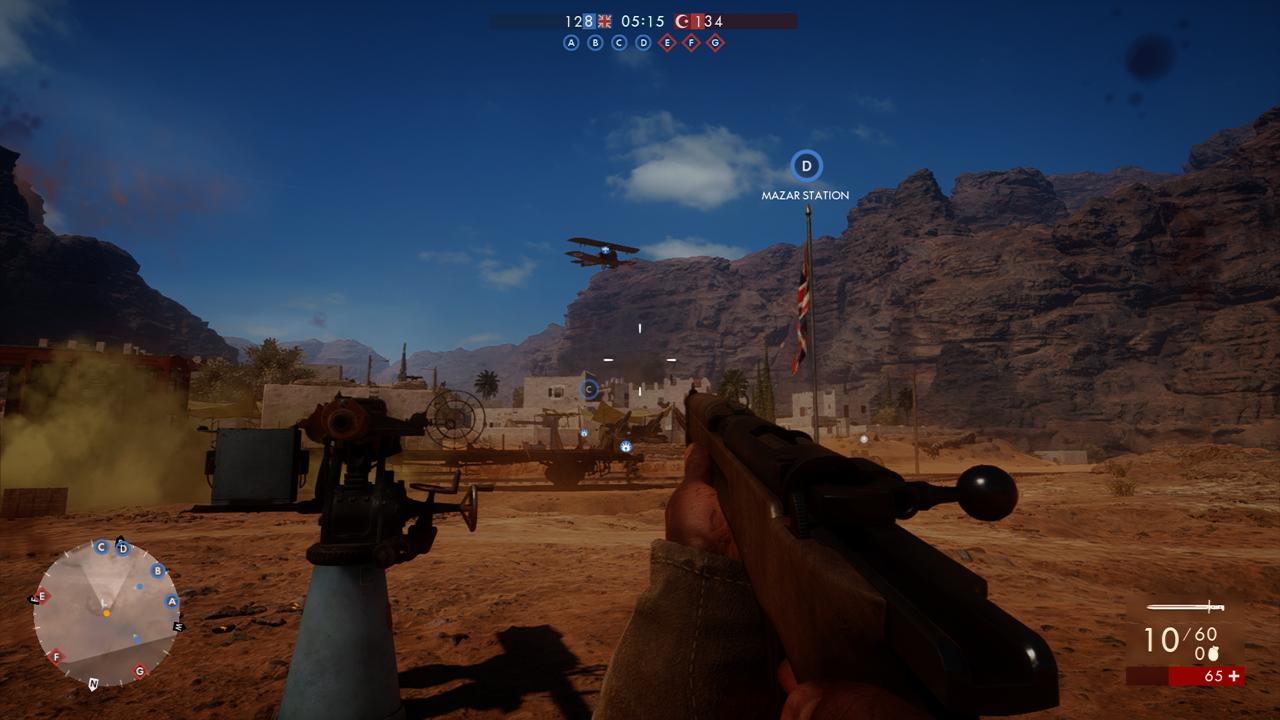
AA at G Flag #1; pretty self-explanatory, on the dune just south of the flag.
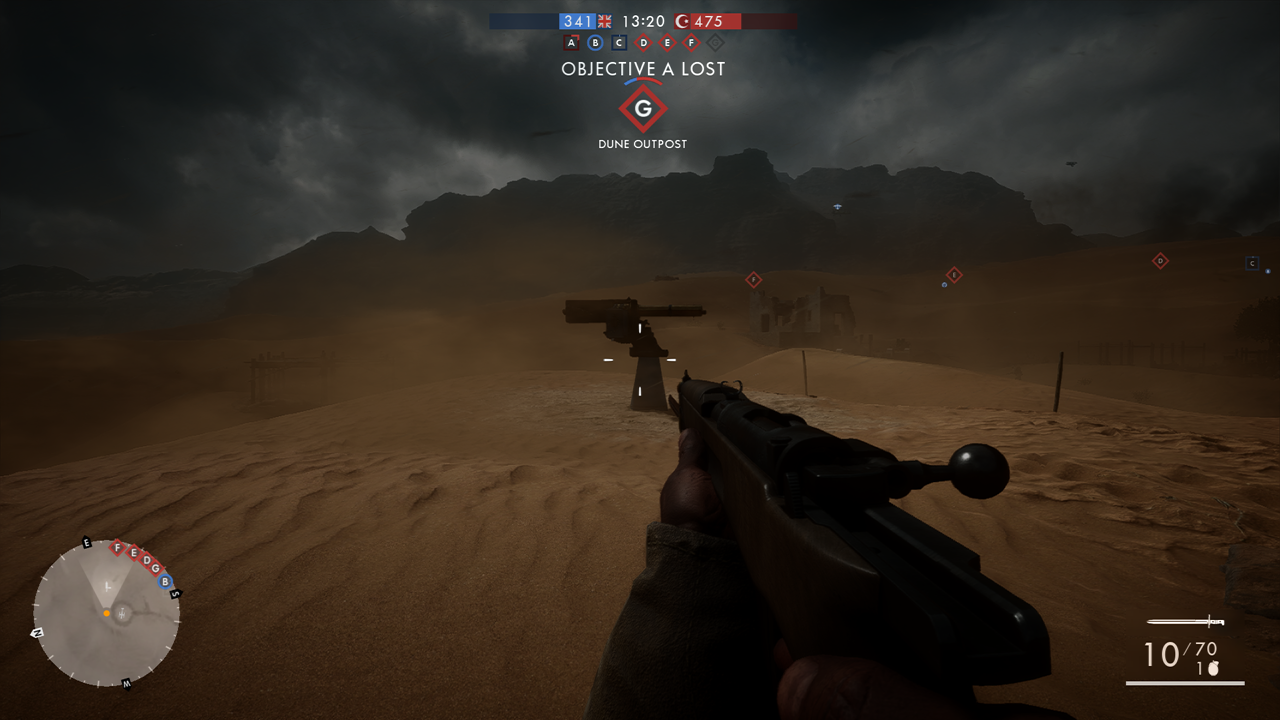
AA at G Flag #2; this one is on top of the building facing A, right next to the flag. It’s often destroyed though as the building is usually nothing but rubble in most games.
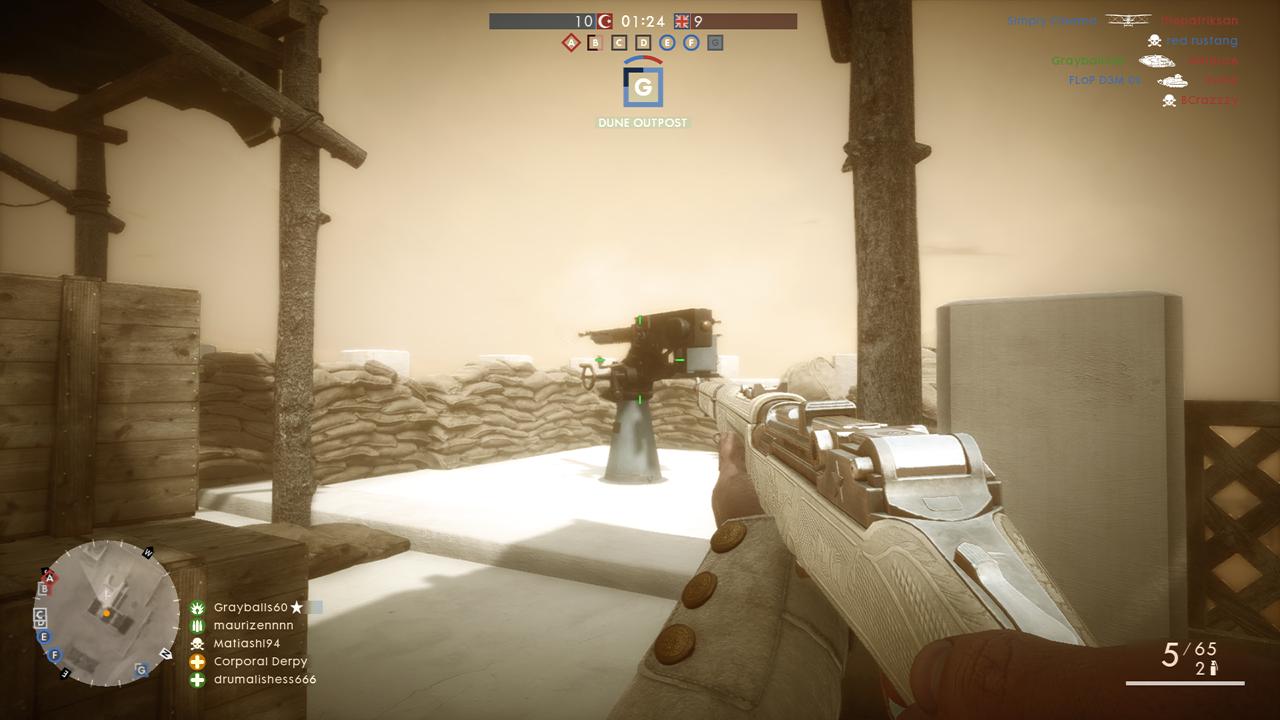
Giant’s Shadow:
Giant’s Shadow has 6 Stationary AA Guns from what I can tell. There is 1 In each deployment, and 4 Others spread throughout the map. Here is the rough map of their locations;
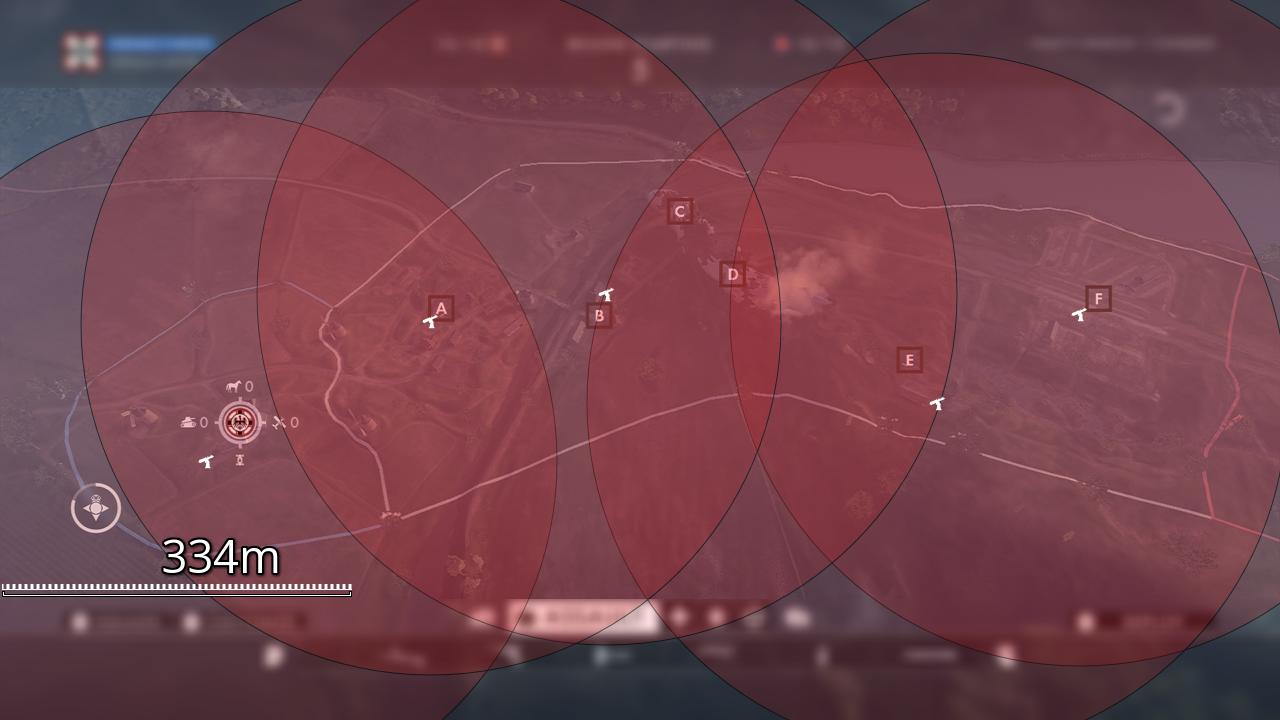
And here are each of their specific locations:
German Deployment; in a little bit of an enclave in the back of the Deployment, just behind one of the many buildings.
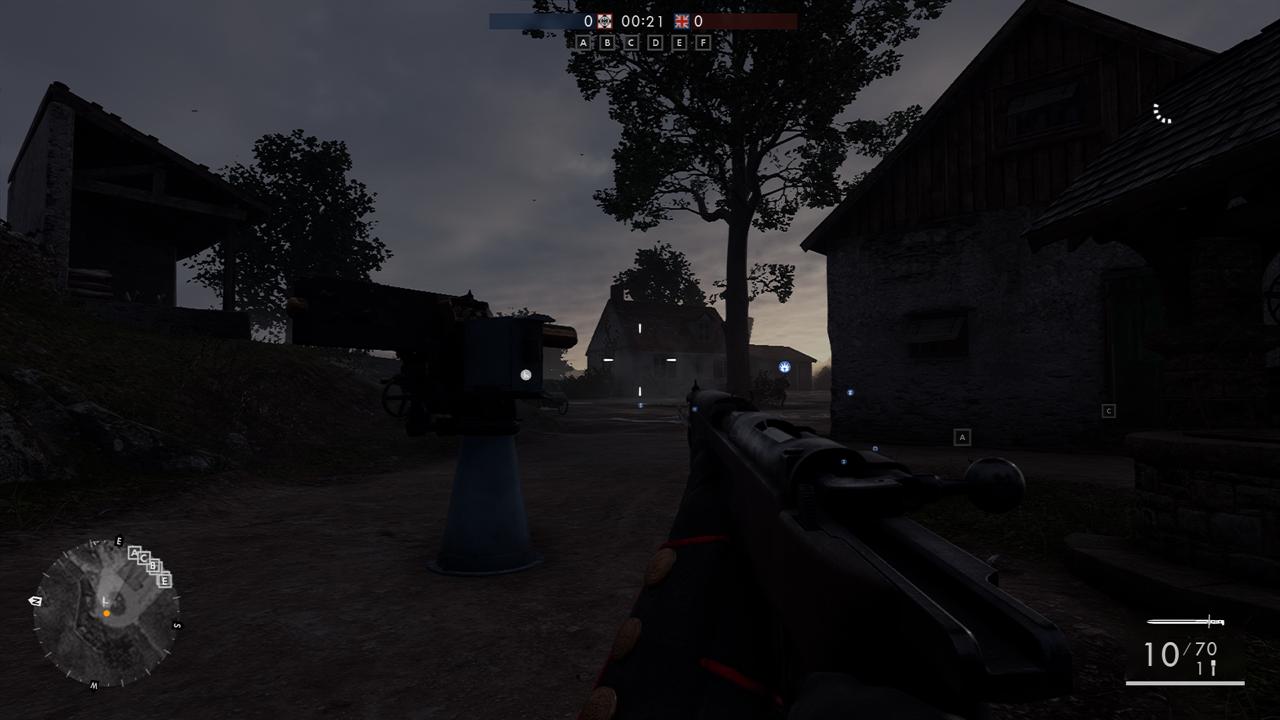
AA at A Flag; just behind a wall next to the flag. You’ll probably run through this little yard when coming from the German Deployment.
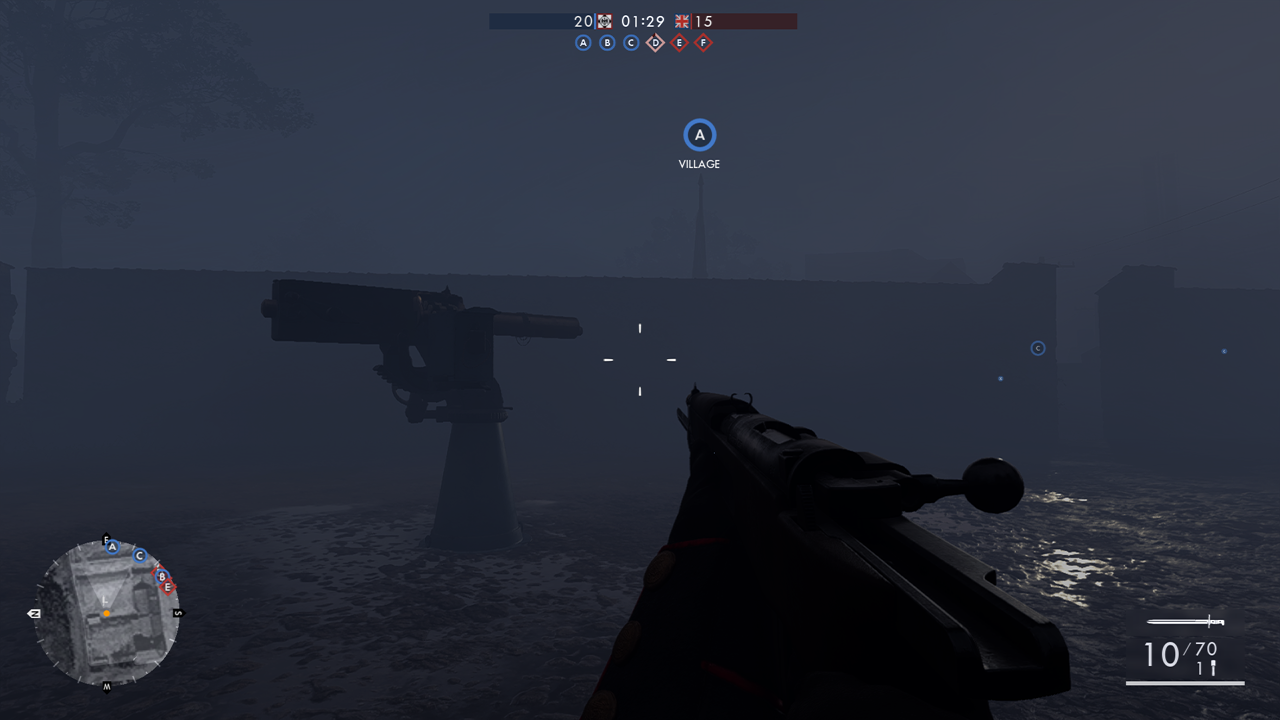
AA at B Flag; left side of the building when coming from across the bridge leading to A.
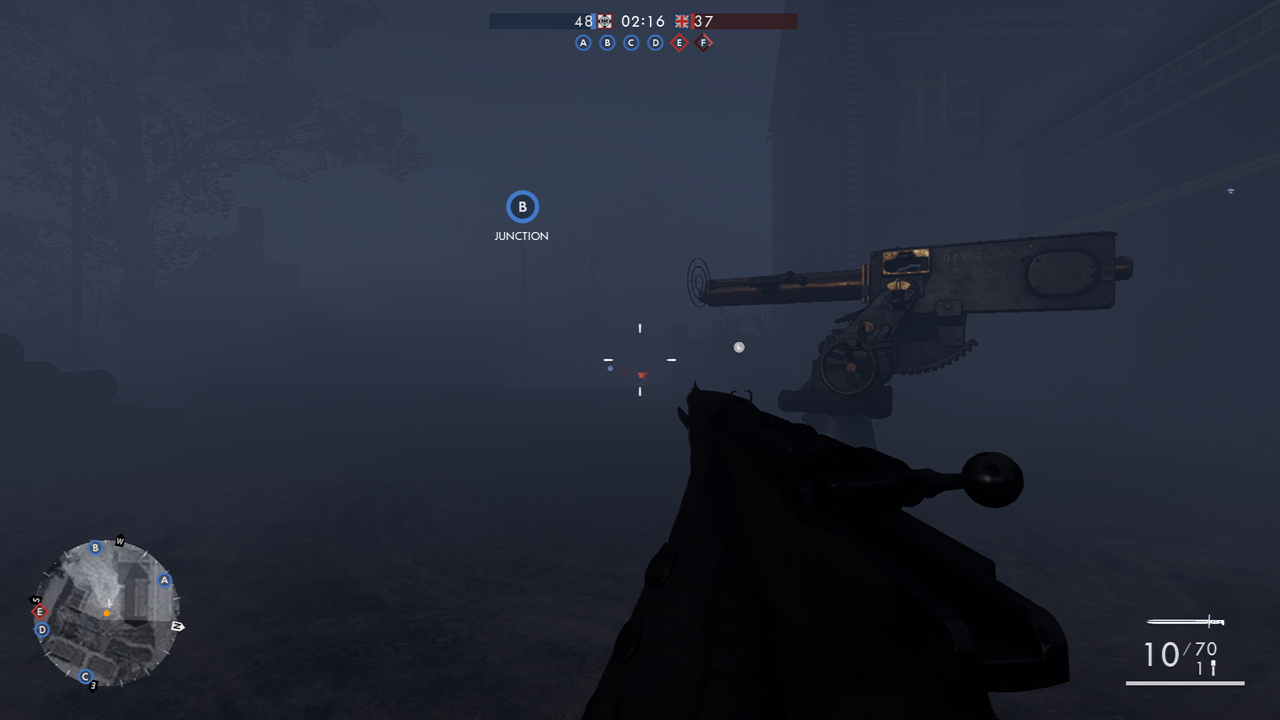
AA at E Flag; behind the building on the south side. Especially open IMO, when compared to the others.
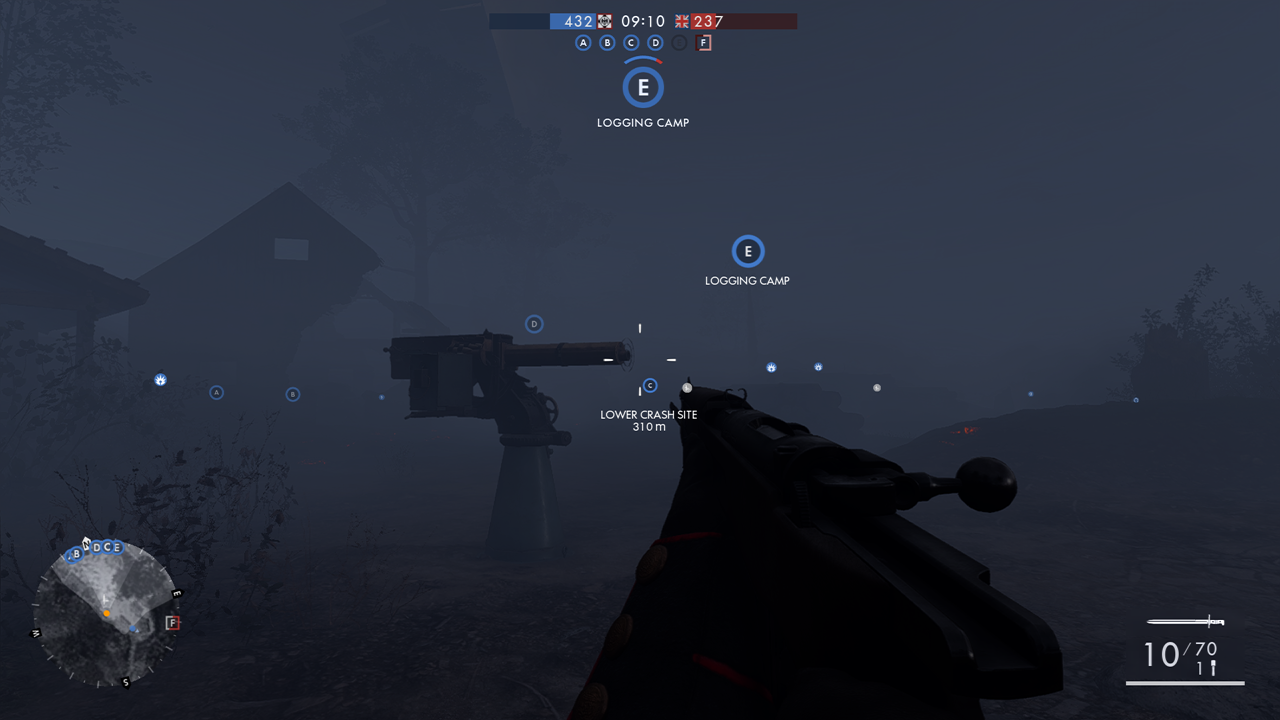
AA at F Flag; behind some logs right next to the F Flag.
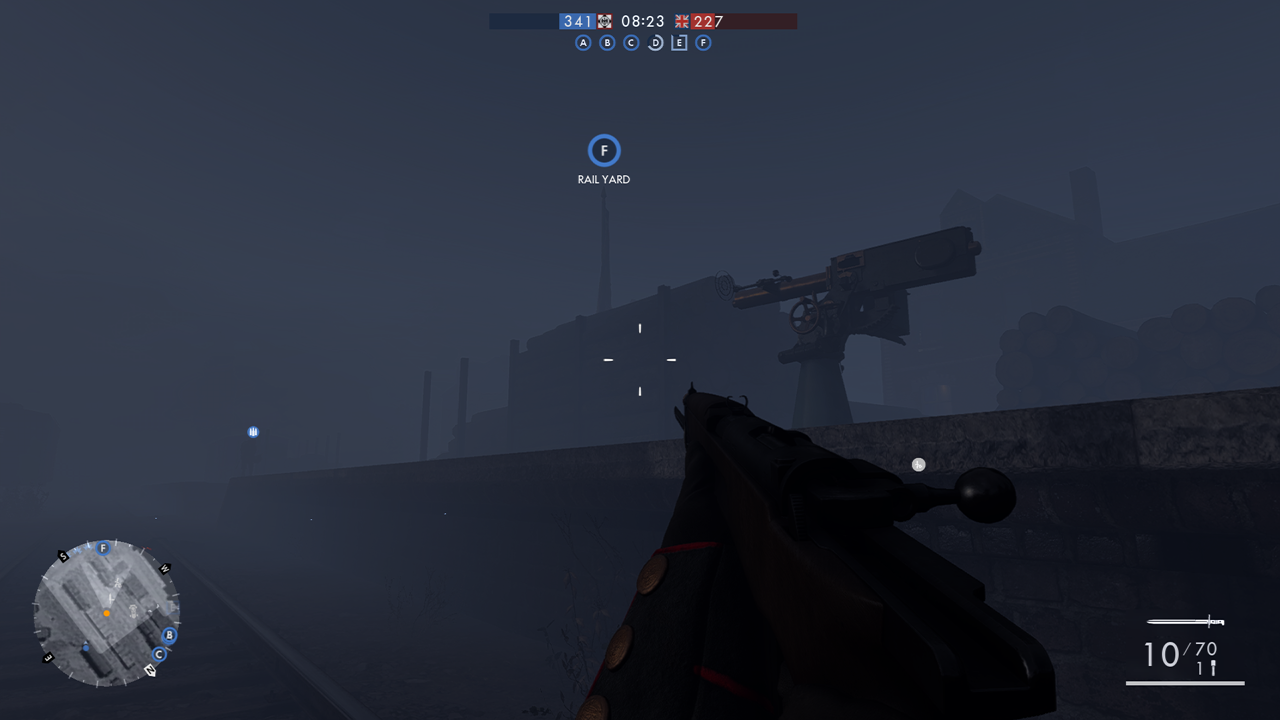
British Deployment (not shown on the above map, sorry about that); a bit in the back of the Deployment, largely obscured by a tree. I bet you can knock that down though.
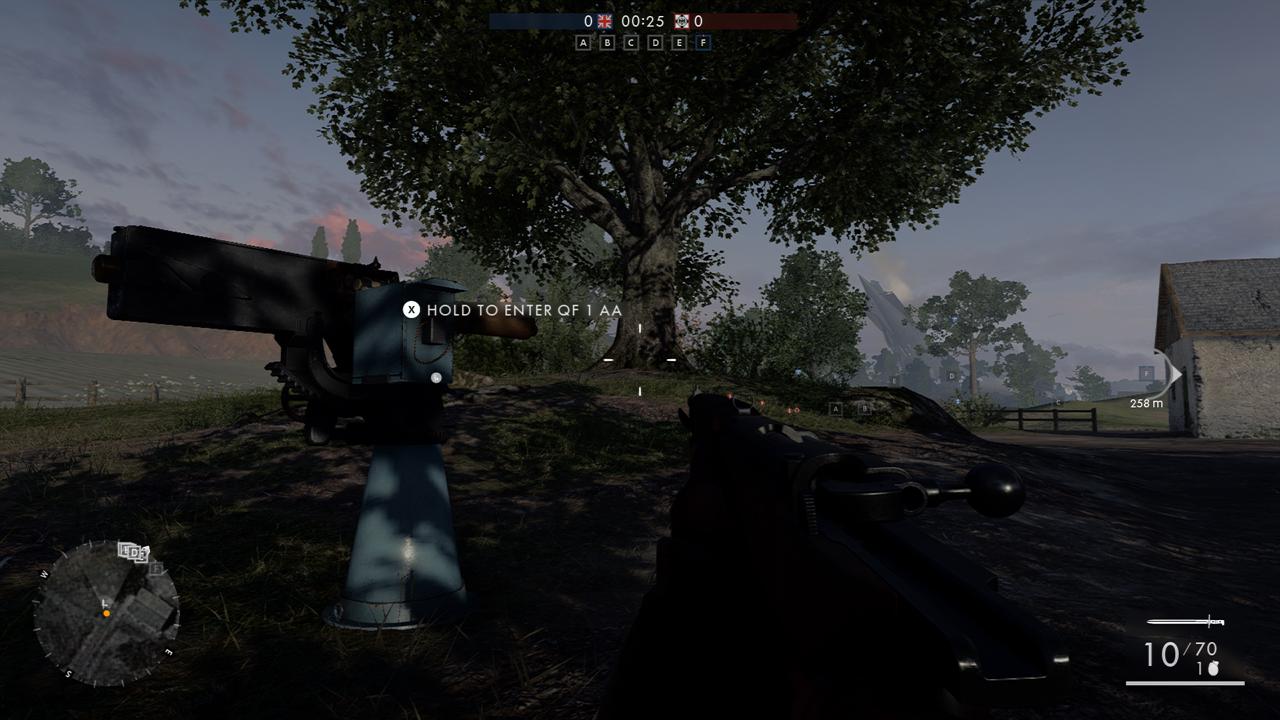
Soissons (They Shall Not Pass DLC):
Soissons has 5 AA Across the rolling fields on the map. 1 Is in each of the deployments respectively, while the other 3 Are between B, C and E. Here is the rough map of their locations;
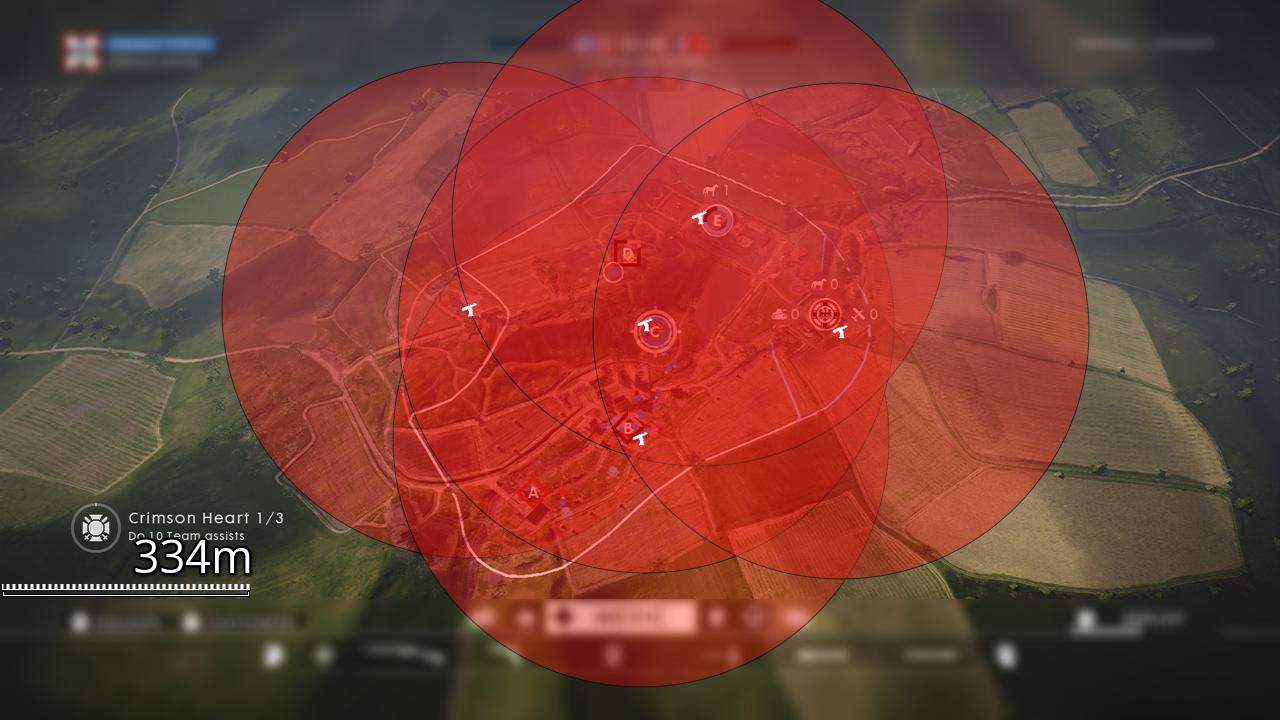
And here are each of their specific locations:
AA in the French deployment, facing towards D.
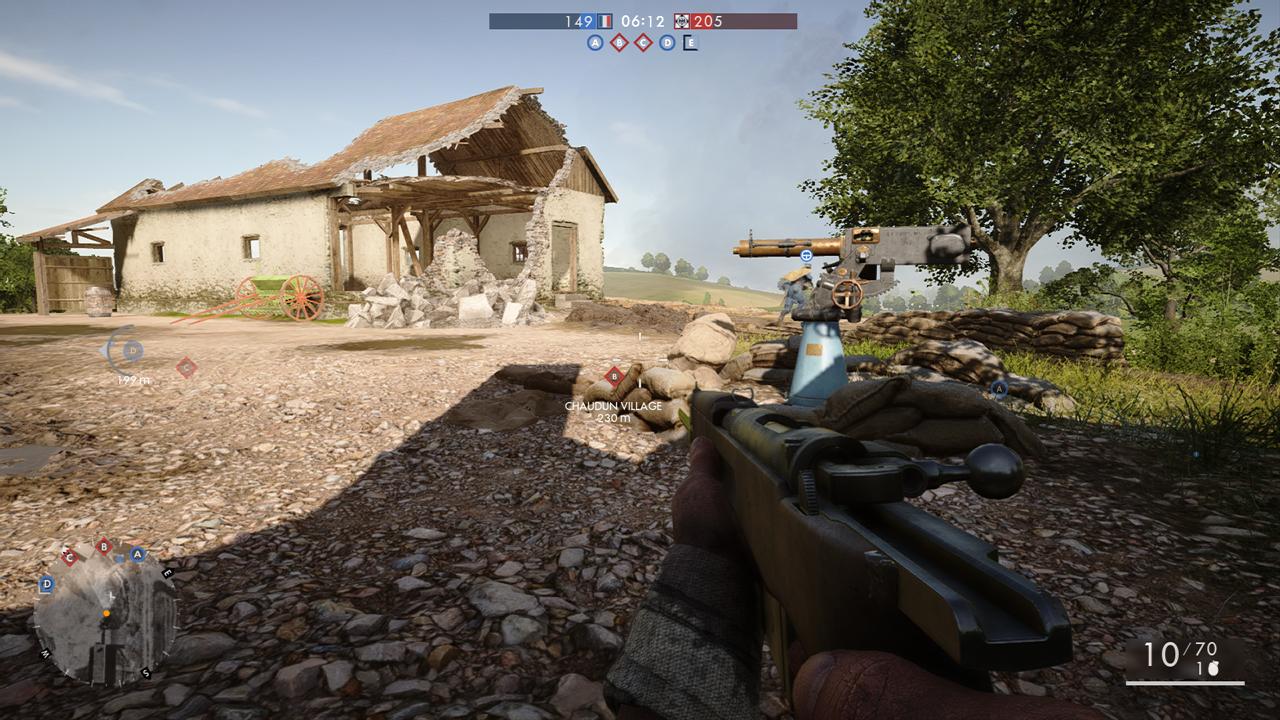
AA at B Flag facing away from C and D.
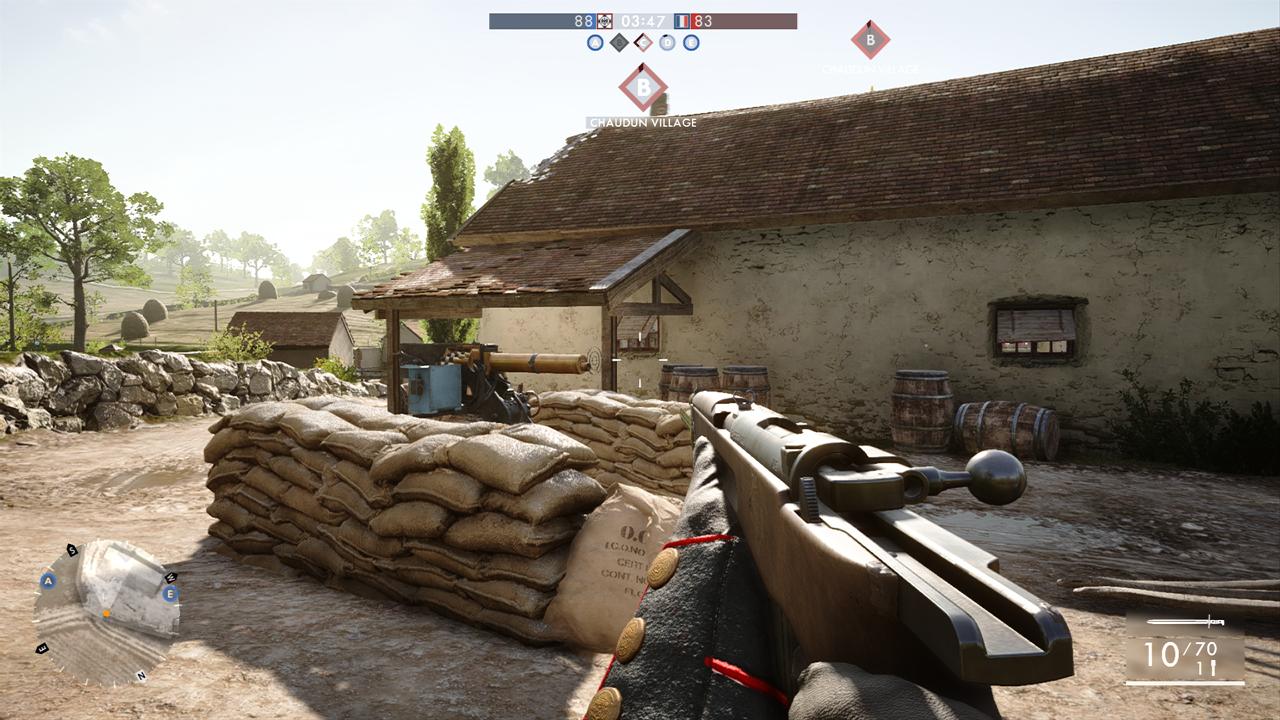
AA at C Flag; it’s right on top of the trenches next to the flag, so I really wouldn’t advise using it if the enemy hold D Or anything. It’s really one of the most exposed AAs in the game IMO.
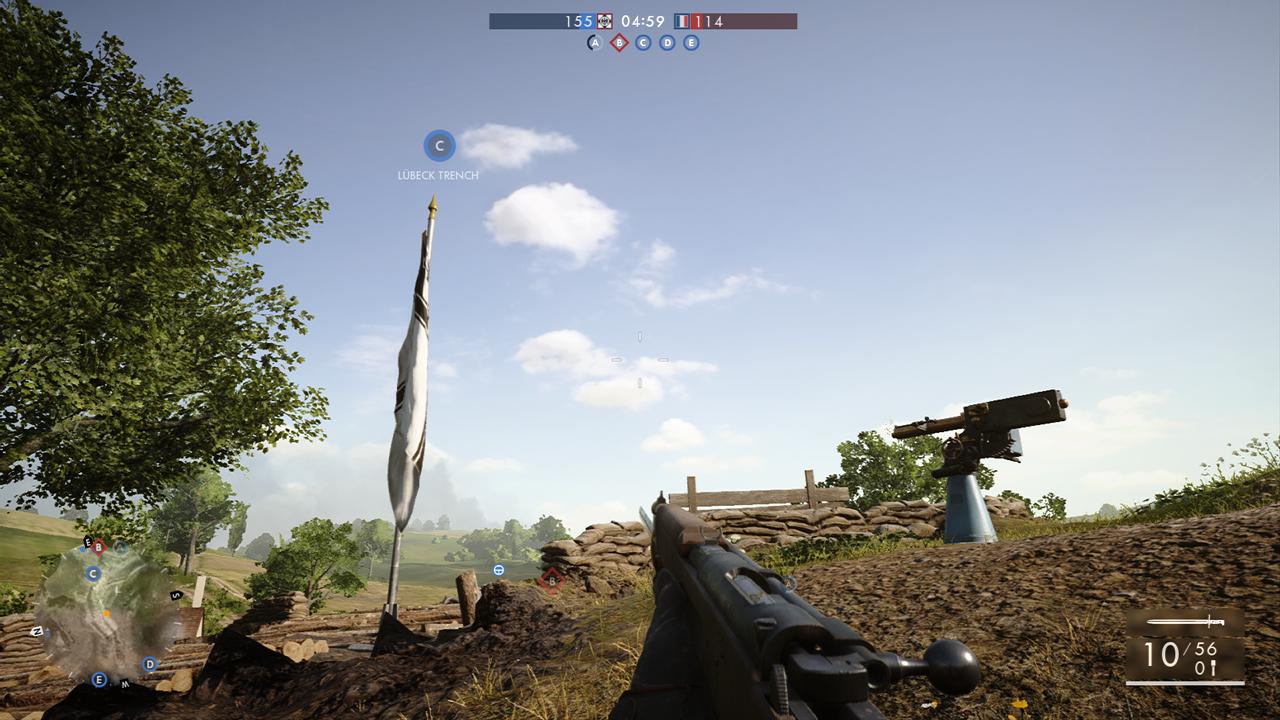
AA at E Flag; across the small bridge with the MG Facing D, just opposite the Chateau.
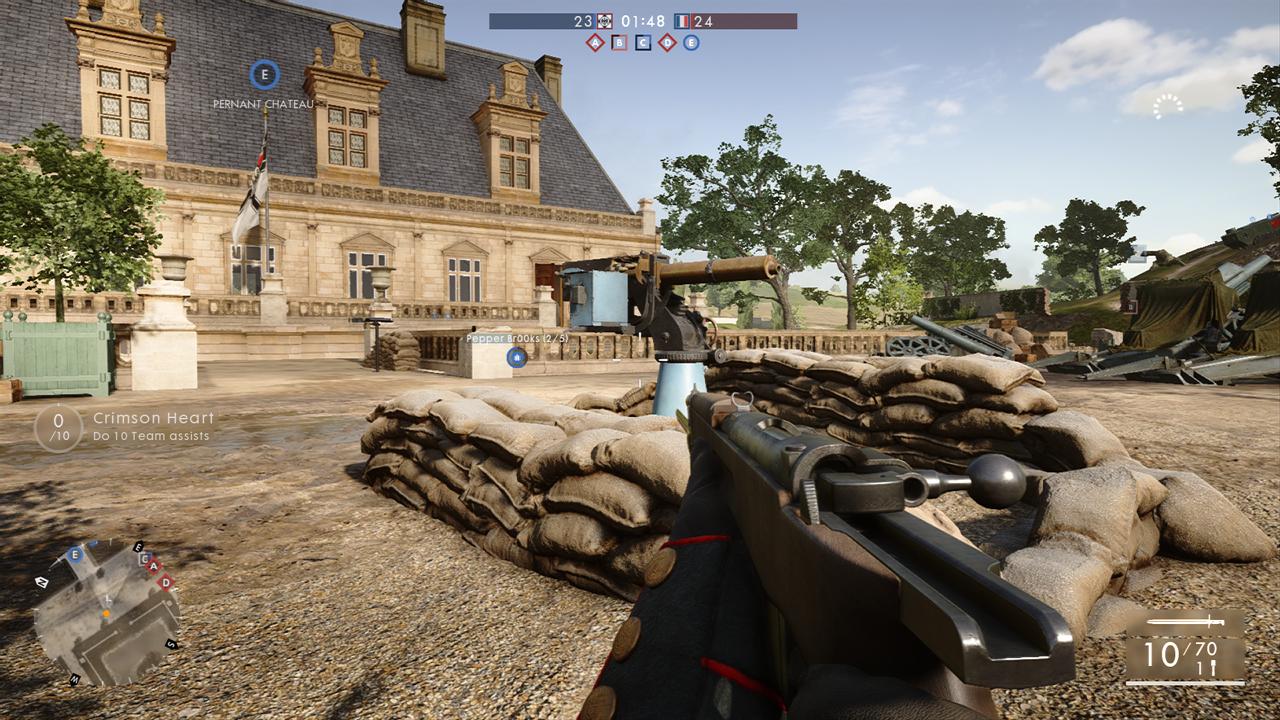
AA in the German deployment, facing away from E.
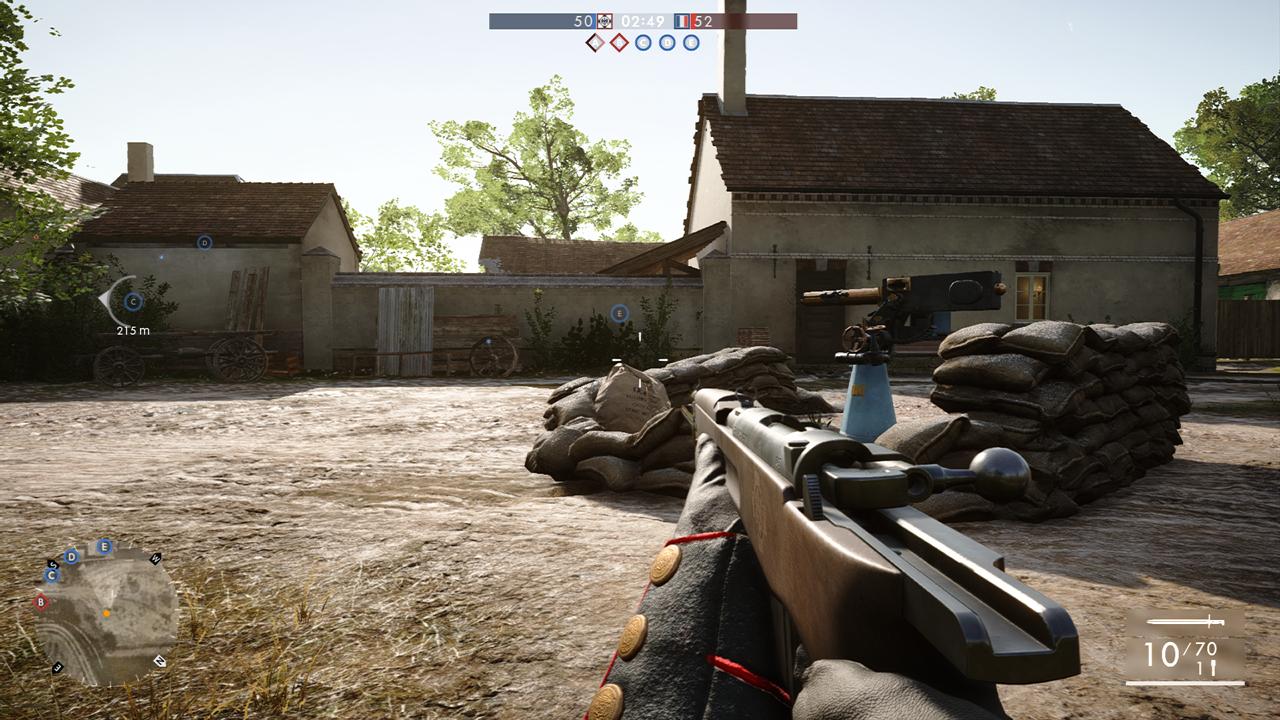
Rupture (They Shall Not Pass DLC):
Rupture, from what I can tell, has only 2 AA. Do note, that they are apparently testing adding 1 AA Into the deployment of both teams in the CTE, so I’ll have to update it then. Nonetheless, here is the rough map of their locations;
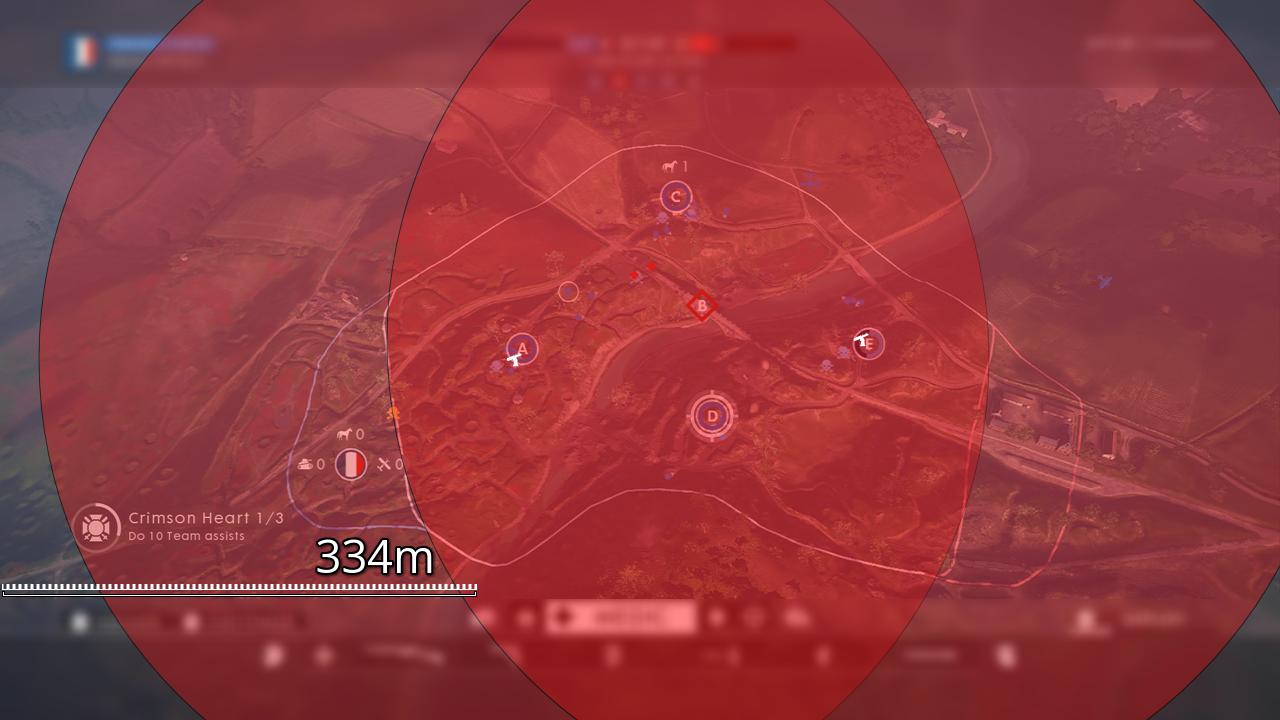
And here are each of their specific locations:
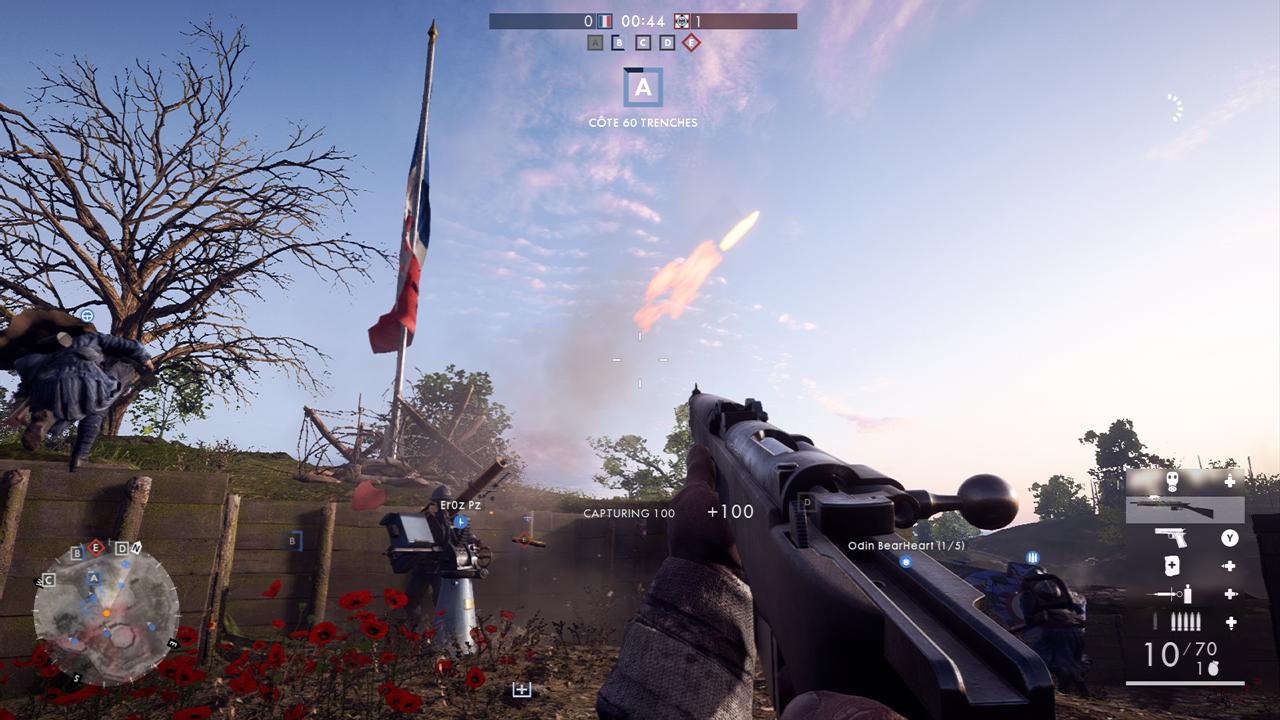
AA at A Flag; it’s literally below the flag, opposite the main pillbox of the Cote 60 Trenches.
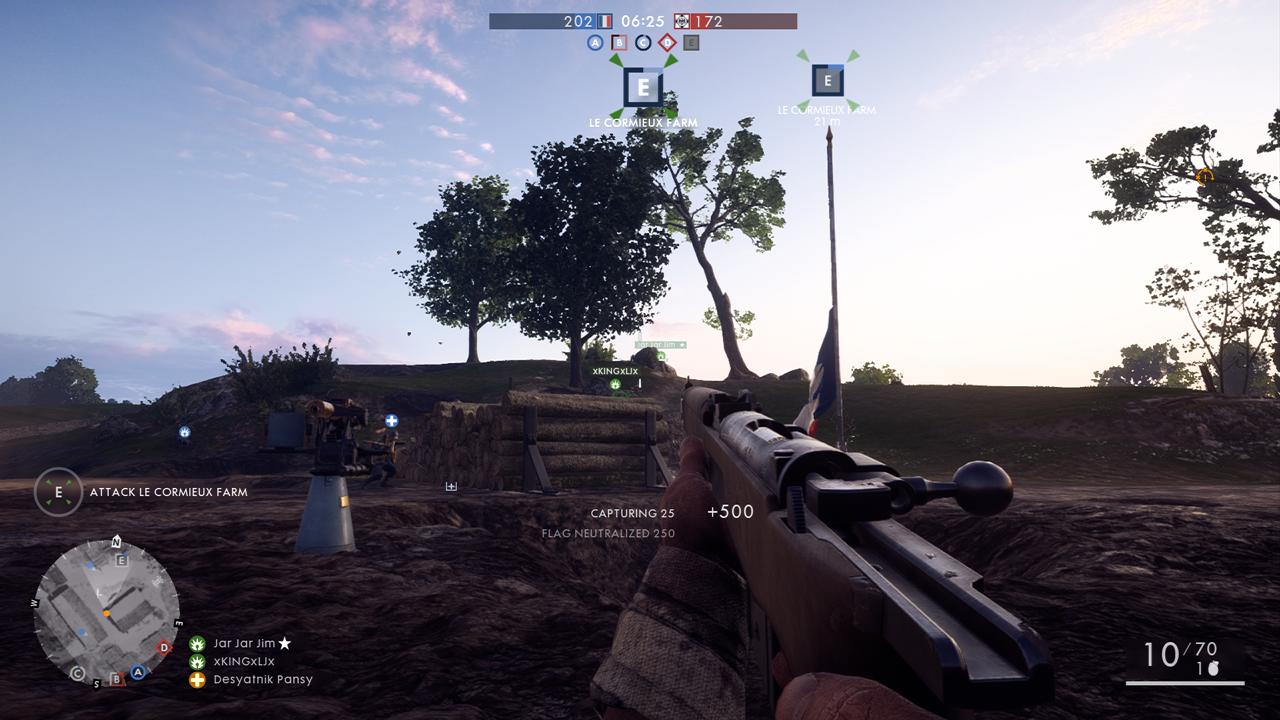
AA at E Flag; in the centre of the farm, right next to the flag.
I hope this helps someone and that you enjoyed viewing it. As stated, if there are any I missed, please inform me. Otherwise.. enjoy?